Wednesday, 29 May 2013

Wicked Polish Pox

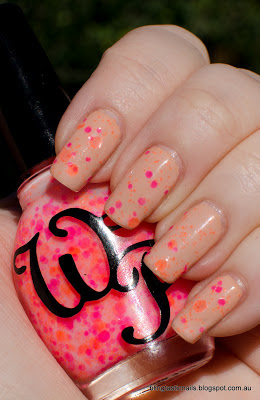
Happy non-work appropriate polish Wednesday! I tend to have Wednesday off more often than not as I work 10 hour shifts at work, and yesterday I received my Wicked Polish from  Harlow & Co. Since I had on a work appropriate nude polish, I thought I would see how Pox would look over it. Boy was I happily surprised and in swoony love with the results :)
Wicked Polish Pox
This is 1 coat of Wicked Polish Pox over Urban Color Nude with Poshe Top Coat

Wicked Polish Pox
Bottle Shot of Wicked Polish Pox

Wicked Polish Pox

Wicked Polish Pox
 Macro of Pox, light pink milky base with neon orange and pink glitter of various sizes.

Wicked Polish Pox
 Up close you can see that a second top coat would be needed to make it glass smooth.

Wicked Polish Pox

How cute is this look? I was super excited to receive my first Wicked Polishes and I am in love with Pox. It's super cute, the neons are so fun! This is a great way to wear neons without being completely smacked in the face by brightness. I hate to say it, but I will, this is probably work appropriate! Gah! Just what I was trying to get away from on my day off, LOL. The nude base makes this elegant and pretty and a great contrast for both the pink and orange glitters. I would take the time to do a second coat of top coat to get that super smooth look but I can't say enough how much I am in looooove with this :)

What do you guy think? Do you have any Wicked Polishes?

xoxo
Jas

Wednesday, 22 May 2013

Sally Hansen Lustre Shine Lava with stamping

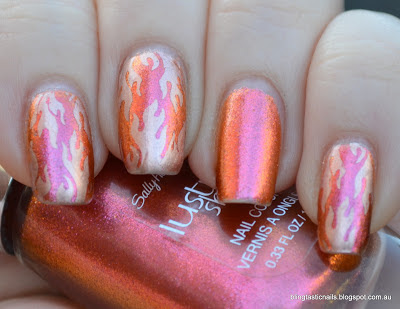
Hello all! It's cold down here in Melb..did I mention hate winter?? Anyways, I was wearing Sally Hansen Lustre Shine Lava the other day and loving it sick, but I wanted to make the polish last a little bit longer, so I thought..STAMPING :) I wanted to stamp with a color that contrasted but complimented the goldy/red color and Essie Penny Talk came to mind. I fossicked amongst my ever growing stamping plate collection and found some flames in my Wistona set that I thought would look pretty cool. Here is the result. 


Sally Hansen Lava Shine with Flame Stamping
 Sally Hansen Lustre Shine Lave with Essie Penny Talk, indirect light

Sally Hansen Lava Shine with Flame Stamping


Sally Hansen Lava Shine with Flame Stamping

Sally Hansen Lava Shine with Flame Stamping
 With flash

This is possibly not the most original combination,but you know what, it works for me :) Essie Penny Talk stamps wonderfully and give this a lovely brassy tone and the duochromatic nature of lustre shine Lava makes the flames almost glow. So I love it, of course! I already have purchased a back up bottle of Sally Hansen Lustre Shine Lava and Essie Penny Talk as I really like both separately AND together! Hope your week is going well. Have you bought any polish? I may have snuck in 5 or so to the stash today :)

Monday, 20 May 2013

Aussie Nails Monday- Lace..and Leather and Curtains!?

Evening chicks, welcome to tonight's quickie..a quick blog post that is ;) I spent the weekend doing a post for a bit later down the track that was super impossible to photograph color-true so I had 4 different attempts at various times of the day with 2 different cameras..it did my head in! I had time to do something for today's Aussie Nails Monday where the theme was Lace. I wanted to make this look tough and to stamp with my new Pueen plates I received in a group buy organised by one of the awesome Aussie Nails chicks.. thanks Nicole! Anyways, my take on this was Leather and Lace, which then turned into Leather and Lace Curtains..take a look!

Nails Inc Leather Noho with black and white lace stamping
 L-R, Nails Inc Leather Noho, CG Liquid Leather stamped with Ulta3 Lily White, same for ring finger except reversed and Nails Inc Leather Noho again.

Nails Inc Leather Noho with black and white lace stamping
I framed the middle and ring finger with "curtains"

This was a fun look and it sort of evolved as I did it. I was keen on the leather and lace, but my friend Emma said the stamping looked like old fashioned curtains..and it does! So I added the "curtains" to frame the lace. This it worked best on the black with white stamp I feel and the other was a bit of a fail, but I gave it a go! I really loved Nails Inc Leather effect in Noho, it just so tough looking. I am keen to play around with it a bit more.
Well, this is the end of the quickie...hope your Monday was awesome!

Check out the other awesome Aussie Chicks


Members


Caylah -
 
Tash -
 
 
Tracy -
 

Thursday, 16 May 2013

OPI Don't Burst My Bubble mix mani

So, I am back at work..and back on my "healthy" diet after a week of eating whatever I felt like (within reason) and I actually feel much better when I am eating more sensibly. Funny that. Being back at work means "work appropriate nail polish" so this my NOTD..or more like Nails of the week, and for this I have been rocking OPI Don't Burst My Bubble. Of course after I put it on..I did some subtle stamping with China Glaze Pinkie Promise so I had pink ALIENS on my ring finger and thumb.  Today I added a gradient, a reverse gradient and an glitter nail with Face Of Australia Heart of Glass. Also I think I have my lightbox set up better, the pics are more true to color :)


OPI Don't Burst My Bubble with gradient, glitter and stamping mani
 L-R, FOA Heart of Glass, reverse gradient, alien stamping and gradient!
Lightbox lighting

OPI Don't Burst My Bubble with gradient, glitter and stamping mani
Very cute all over mani!

I actually really like this! The Face of Australia Heart of Glass was super cute although I didn't glitter fish to get some of the bigger glitter out like I should have. I love the pink alien stamping! Only I really know it's there and I have a full thumb stamped with the same. The gradients make this more interesting and I must say how much I love China Glaze Pinkie Promise as a lovely pink but not too girly! I've also been wearing this mani for 4 days with minimal tip wear which I am attributing to OPI Chip Skip which I just purchased and used on this mani. TGIF is all I can when tomorrow comes! I am feeling like I need a polish Sunday coming on :)

Sunday, 12 May 2013

One Year Blogiversary and Essie In the Cab-ana Kitchen Sink Mani

What? I've only just clued on that it's been a year since my first blog post..time does fly! So 175 posts later and I still a passion for polish and blogging as well as learning so much about polish, indie polishes and nail art techniques. I've met some amazing polish makers, nail artists and just plain out nice people in the nail polish world that I am pretty happy to be a very small part of the community. 

Today I am going to do a comparison post (and cringe at my cuticles!) as I started to paint my nails to stop biting them. So I was pretty bad at biting my nails and cuticles. It's taken ages to get my poor maligned fingers into better condition. My very first pic was taken on my iphone. So will the current mani that I am wearing so we are comparing apples with apples. We all started somewhere!

So a pic from today :)
Essie In the Cab-ana with L-R, Striping and Kleancolor Metallic Sapphire, Striping tape and rhinestone, stamping with Kleancolor Metallic Sapphire and China Glaze Glistening Snow dots, French tip with loose glitter.

Blue Skittles Mani with silver stamping using Bundle Monster plates

Well, that wasn't so bad was it? Okay, if I am being picky with the comparison - my nails are longer, less cuticle flooding, better cuticle condition..I think my stamping was pretty good though back then! Helped that I unknowingly had one of the best stamping silvers with China Glaze Millennium :) 
I've been prattling about a Giveaway, I guess the celebration of blogging for one year should be a good a reason as any. As soon as I can get my butt into gear I will do it.. :)

Friday, 10 May 2013

KKCenterhk Review- Purple Glitter Circle Nail Art

Hello! Today I have for you a review on one of the KKCenterhk nail art products that was sent to me by KKCenterhk. I was sent N.nail 2.5mm Purple Circle Glitter, which on the website looked like below, and in itself was pretty exciting as I love both purple and sparkly things.
KKCenterhk NNail Purple Circle Glitter
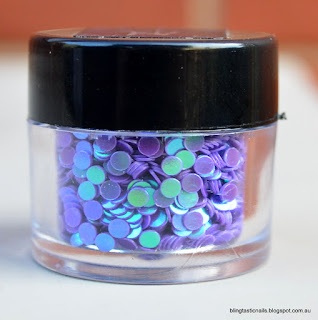
The thought of all the gorgeous purple iridescent glitter made me excited to try the product and I wasn't disappointed by what I was sent. Here is the product I received.

KKCenterhk NNail Purple Circle Glitter

KKCenterhk NNail Purple Circle Glitter
My pot of gorgeous purple iridescent circle glittah!

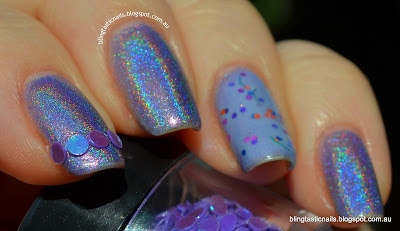
For this nail art look, I started with a lovely purple base color with Girly Bits Twitterpater, and my ring finger got a coat of Face of Australia Boogie Wonderland but the star of this show was my first finger...just see.
Girly Bits Twitterpated with Purple Circle Glitter accent nail
First of all I did like a French Mani glitter line, it was a little hard to photograph the iridescence.

Girly Bits Twitterpated with Purple Circle Glitter accent nail
 Look how well the blue iridescence matches with holographic-ness in the polish!

Girly Bits Twitterpated with Purple Circle Glitter accent nail
 To apply the dots I used tweezers and some polish top coat to fix in place. 

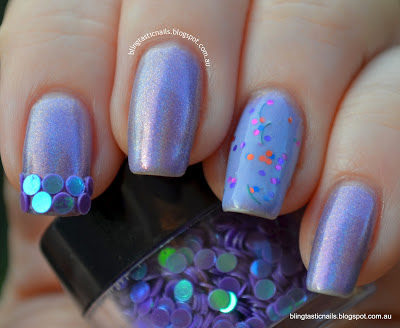
Then, I added a second layer of glitter circle dots, which I think looks even better!
Girly Bits Twitterpated with Purple Circle Glitter accent nail


Girly Bits Twitterpated with Purple Circle Glitter accent nail

Girly Bits Twitterpated with Purple Circle Glitter accent nail

Girly Bits Twitterpated with Purple Circle Glitter accent nail
 The iridescence of the glitter is actually most pronounced in the shade and lovely to look at.

As you can see, there is heap of glitter circle dots in the container which cost $8USD and the iridescence of the glitter is just gorgeous! They were easy to fish out, and apply with some polish to hold them on. After I took these photos I wore the mani for a while and did manage to knock a dot off after a few hours. After replaced it I did a top coat of Seche Vite which didn't affect the look of mani and the dots held solid for days..so I would recommend a top coat or you will be leaving dot glitter everywhere. The iridescent properties of these glitters make them stand out in my opinion as it adds something extra that in interesting!

If you want to get some of these you can at KKcenterhk and the product I used is here: NNail 2.5mm Circle Glitter Purple. If you have a look at the website there is heap s of other colors with iridescent finishes, so there is a something for everyone's taste. $8 for a pot of glitter is a bit on the expensive side, but KKcentrehk is having a 20% off for the month of May, and there is a 10% discount for my blog readers which makes these more attractive. Just use the unique coupon code of "blingnails". The coupon is valid until Jan 31st 2014. Stay tuned for my other KKCentrehk product review soon.

*note this product was sent to me by review but has not influenced my opinion of the product.
Thursday, 9 May 2013

Sally Hansen Lustre Shine Lava

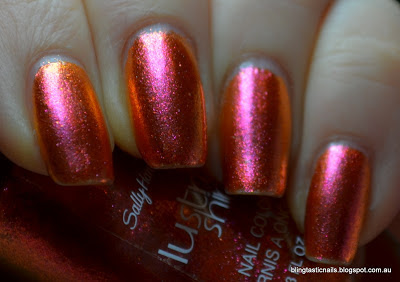
Hi guys! I've been playing with my husbands new camera and my lightbox to try and improve my inside pics now that winter is coming. Nothing like putting things through their paces with a nice and simple multichrome irridescent orange/pink/red polish to ease into it, LOL. I've been hanging out for this polish for a little bit but wasn't sure when they were coming to Australia but did resist ordering this one in particular online and picked this up a few days ago on special.

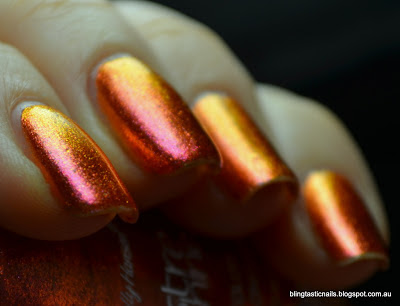
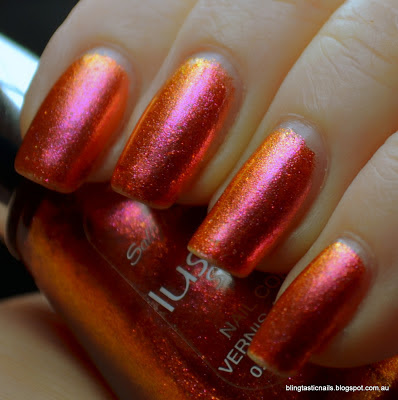
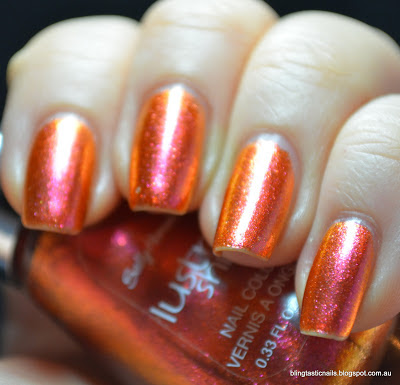
This is 2 coats of Sally Hansen Lustre Shine Lava with no top coat, sorry, there is like a gagillion photos because this polish is awesome!

Sally Hansen Lustre Shine Lava
Awesome on the nail

Sally Hansen Lustre Shine Lava
Awesome in the bottle!

Sally Hansen Lustre Shine Lava
 Dark Pink/Red in this light and also in full sunlight

Sally Hansen Lustre Shine Lava
Start of gold/orange shimmer

Sally Hansen Lustre Shine Lava
Pinky orange color shift

Sally Hansen Lustre Shine Lava
 Mostly orange shift!

Sally Hansen Lustre Shine Lava
Hmm, this photo is just cos :)

Sally Hansen Lustre Shine Lava
This is just cos as well!

Sally Hansen Lustre Shine Lava
Extreme close up of awesomeness

 So, are you in love with this polish yet? These pics show why I was lusting after it. The only issue I had with this polish is with clean up. The polish itself is made up of micro flecks suspended in the base, so clean up an be a bit of a pain as the micro flecks just scatter everywhere. Recommend careful application! There was no change to polish or the color after adding a top coat. You can get these from Priceline or Chemist Warehouse. Some of the other colors remind me of the China Glaze Bohemian collection, but a bit more accessible to most aussie chicks who love polish. China Glaze isn't widely known about here!
Tuesday, 7 May 2013

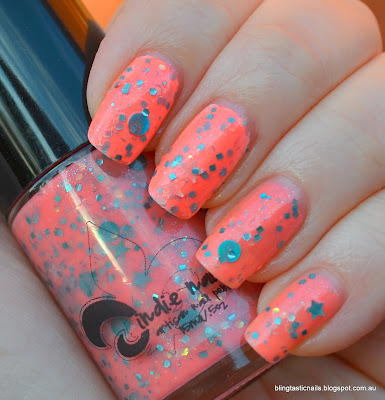
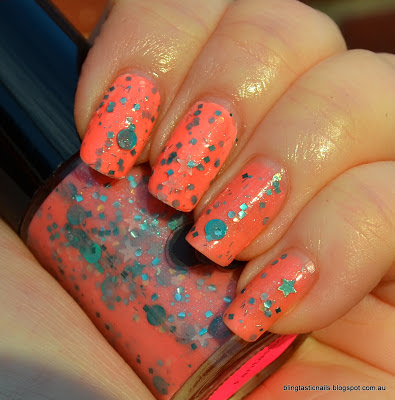
Jindie Nails Fantastical

Evening all and sundry :) What's this?? Another post. See, holidays agree with me! I got some nail mail a few days ago and in that mail was 3 lovely Jindie polishes..Fantastical stood out to me immediately.. so of course I put it on and well, its awesome. Fantastical is touted as a Melon pink crelly base with assorted hex, circle, square and star glitter in aqua and gold, and yes..it is. BUT I decided to put this bad boy over some white base polish to see what that would do and woohoo did it change into a completely different creature. It reminded me of China Glaze Flip Flop Fantasy on crack..in a good way. So, there are going to be too many photos..but I loveee this color. I do blame Andrea/Plasmaspeedo for my growing love of coral/peach colors, but who am I kidding, I really like nearly all polish colors :)

Jindie Nails Fantastical
Jindie Nails Fantastical. 2 coats over white on first and middle finger, 2 coats by itself on ring and little finger. No top coat and in the shade.

Jindie Nails Fantastical
Neon coral over white! Melon on its own :)

Jindie Nails Fantastical
Up close you can see the bar glitter and shimmer in the polish

Jindie Nails Fantastical
Jindie Fantastical in the sun

Jindie Nails Fantastical
 The neon of the polish over white pops in the sunlight!

So, this polish was a surprise for me.. I knew that I really liked this polish and hoped it looked on the nail as it did in the bottle and for the non summer months this is how I will be wearing it. Come summer though I think I will be breaking out the neon version! It's just so vibrant and pops over the white polish. I didn't top coat this but you can see that it definitely needs a good thick top coat. I LOVE the bar glitter and bit dot glitters..dots are my current obsession :) What are your thoughts? Which way do you prefer Fantastical, neon or not?

Essie Jag-u-are with stamping- Wedding nails!

So, my week of insanity is over and I am on annual leave for this week..yay! I went to a lovely wedding on Friday just gone and decided on Essie Jag-u-are with stamping. The only problem was I didn't get to the stamping ON the night of the wedding. It didn't really matter as no one was looking at my nails, all eyes were on the bride. Luckily I did an awesome job on HER nails! LOL.  So, anyways. I got Jag-u-are on my nails for the wedding and after quite a few drinks and dancing that night I woke at 4.48 am unable to sleep. So I did the rest of the mani then..how cray cray am I?? Anyways, here is the result!
Essie Jag-u-are with stamping
Essie Jag-u-are with NerdLacquer Warrior Ethos accent and stamping

Essie Jag-u-are with stamping
This pic shows how the red can also look!

NerdLacquer Warrior Ethos
Up close and personal of NL Warrior Ethos, pretty iridescent shimmer!

Essie Jag-u-are and Nfu Oh 49
 Nfu-Oh 49 on my thumb!

Essie Jag-u-are with stamping
 Creative angle shot!
 This was pretty fun when I finally finished this mani :) Too bad I didn't finish it for the wedding, but I really wasn't too fussed by that. The wedding was great and the bride and groom looked lovely and I definitely had a great time! I have all this week to play with polish and I am soooo excited..I have cleaned the house a bit today, read some books..and chilled out. Soo excited!