Tuesday, 31 July 2012

The Great Aussie Polish Challenge- Day 2, Ulta3

The Great Aussie Polish Challenge
Today is Day 2 of The Great Aussie Polish Challenge and that means it's Ulta3 Tuesday!
Ulta3 is an Aussie Polish brand that you see in the Chemists (Drugstores) and Targets all over the country in big bins that require bin diving to find the colors you are looking for :) They are a whole $2 each and have a great range of colors and great formulas...a bargain, which is the great Australian way. Recently the production has shifted to China resulting in slight different formulas, some better, some worse, some not noticeable.


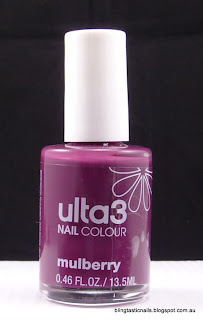
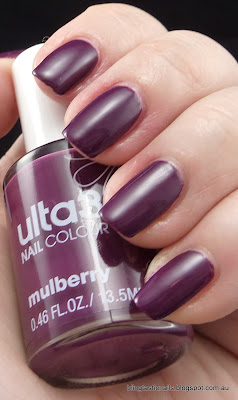
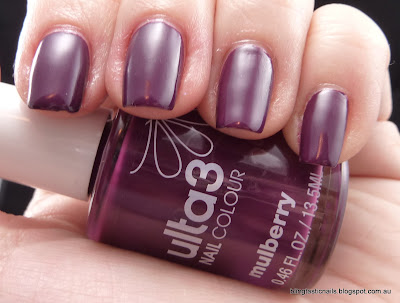
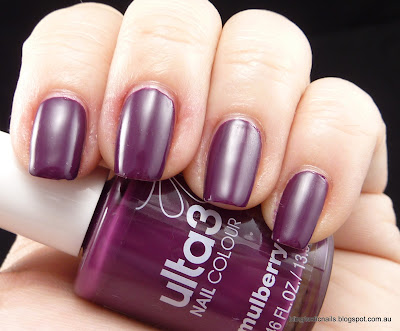
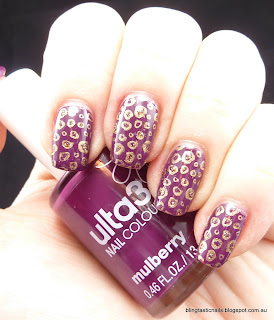
Today I bring you Ulta3 Mulberry. Mulberry I acquired by accident in my Bellabox for July and was pretty thrilled as this isn't usually a color I go for. It's a deep plum dusky purple that is gorgeous. This is the Made in the Aus version. 
Ulta3 MulberryUlta3 Mulberry
 Ulta3 Mulberry without and with flash

Ulta3 Mulberry
Awesome purple vampiness!

Ulta3 Mulberry

Ulta3 Mulberry

Ulta3 Mulberry

Ulta3 Mulberry
Such a great deep purple :)

Then just to try it out I stamped over Mulberry in Ulta3 Gold Rush Fever and added some Glitter with Ulta3 Gold Digger, here are the results

Ulta3 Gold Rush FeverUlta3 Gold Digger
 Gold Rush Fever and Gold Digger

Ulta3 Mulberry and Gold Rush Fever stamping

Ulta3 Mulberry and Gold Rush Fever stamping

Ulta3 Mulberry and Gold Rush Fever stamping

Ulta3 Mulberry and Gold Rush Fever stamping
Gratuitious wierd lighting shot!
Gold Rush Fever stamped so well, it was really easy to get a good print out of it. I used Cheeky 1 stamping plate for the design and filled in some of the print with glitter and then Seche Vite the whole design :) Ulta3 have some amazing colors and a tiny price. They can be underestimated by the general population they definitely get a gold medal in my opinion!

Please check out the other chicks doing The Great Aussie Polish Challenge below:

Monday, 30 July 2012

The Great Aussie Polish Challege!

The Great Aussie Polish Challenge

A Group of us Aussie girls have decided to celebrate all that is Aussie in the polish world for the Olympics.Today I have Day 1 of a week of Australian polish. Polish that is made in Australia, made by Australians and worn by.... people all over the world,LOL. Today I have for you Picture Polish.

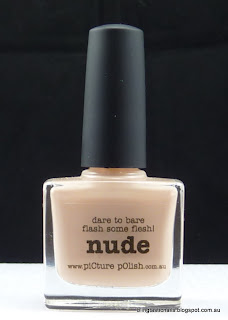
 Coincidentally, Picture Polish have released all new polishes by bloggers, and some lovely mesh colors, yay! I think I will be purchasing some lovely new pretties from them soon (Mirage is calling my name). Today though, I have the entirety of my Picture Polish Collection in one post. Don't get excited..it's a whole 2 polishes :) Wisteria  for "all those quirky housewives out there". I love it because it's purple and purple rocks. The other is Nude "dare to bare flash some flesh" which I must admit was free with some Ozotics but it's a very universal polish. I really love the little sayings on the bottle..they give each one such character.

Picture Polish WisteriaPicture Polish Nude
Picture Polish Wisteria and Nude

Picture Polish Wisteria
Wisteria, 2 coats no top coat

Picture Polish Wisteria


Picture Polish Wisteria


Picture Polish Wisteria
Gratuitous Wierd bottle Shot!

Picture Polish WisteriaPicture Polish Wisteria
 Wisteria without and with flash

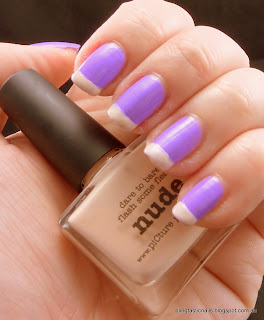
To add a bit of detail, I decided to do french tips to Wisteria in Picture Polish Nude!

Picture Polish Wisteria and Nude

Picture Polish Wisteria and Nude

Picture Polish Wisteria and Nude
Nudey Wisteria


 Wisteria is a lovely color, I don't have anything else like it in my collection. The formula for the polish is pretty good, I found the nude to be a bit 'sticky' though. The brushes are on the thinner side which is good for getting in the edges but feel a bit strange after being used to wider brushes. Picture Polishes can be bought here and you can have a look around the blog world for swatches of the new colors.


The other lovely ladies participating in The Great Aussie Polish Challenge can be found listed here, click on the links and see their Aussie Polish delights :)
All Things Charmed
Lacquer Dreams 
Osiris and Loki Paint Their Nails
Polished Peripherals
Shatter me Claire
The Polish Haven

Sunday, 29 July 2012

Essence Toffee to Go with Essence Space Queen

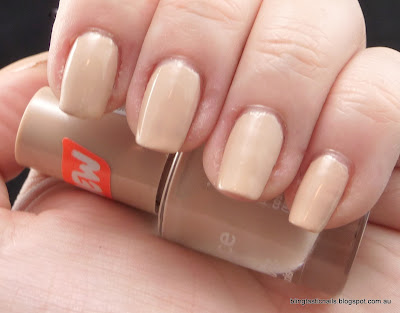
Hello, hello and good evening to you all. I have a impulse buy polish that I bought today to show you. I have been expounding recently to the non polish people the benefits of Essences polishes. The bottle are small, the price is small and there are many lovely color to chose from. So of course, after talking about said polish to others I feel the need to go back looking at the pretties I have been promoting, LOL. Today I grabbed Toffee to Go and Space Queen from Essence when I was meant to helping the other half buy a white shirt :)

Essence Toffee to Go
 Essence Toffe to Go- a nude glam apparently!

Essence Toffee to Go
Quite Nude and Glam-like, I think :)

Essence Toffee to Go

Essence Toffee to Go

Essence Toffee to Go
Toffee to Go with Flash, hmm dead fingers a bit? Or is that just my pale skin!

Now to add some bling, how could I go past Space Queen?

Essence Space Queen
 Space Queen

Essence Space Queen over Toffee to Go
Space Queen over Toffee to Go

Essence Space Queen over Toffee to Go


Essence Space Queen over Toffee to Go

Essence Space Queen over Toffee to Go

 As you can see, Space Queen is a little hard to photograph over Toffee to Go, but they do go so well together. It makes that nude polish just a little bit blingier without slapping people over the head screaming "Look at my Glitter polish!!". The glitters appear to be holographic and the slight pink tint in Space Queen is not noticeable at all over the nude polish. This combo will have people wondering why you keep staring at your fingers...it's a secret between you and your nudey blingy digits! :) 

What did I use: Ulta3 Base Coat
                         Essence Toffee to Go
                         Essence Space Queen
                         No top Coat for the pics!


Saturday, 28 July 2012

OPI Black Spotted over Layla Metal Chrome

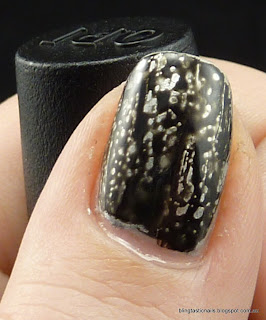
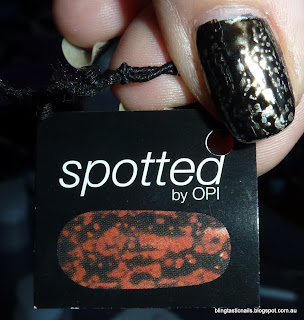
Hey All! Tonight I have a post for you with a special polish. Well, to me most polishes are special in their own way :) This one is a cousin of the shatter polishes and a part of the European OPI Spiderman collection- it's called Black Spotted. For those of the polish world you all know of Black Spotted. Love it, hate it, not sure about it. I have been through all those phases. I knew I had to have it though to give it a chance in person... it's how I roll :)  So onto ebay I went as I have no European connections in da polish blogging world (me the newbish blogger) and last week my OPI Black Spotted arrived :) Here is my first attempt at Black Spotted..onto the photo spam!

OPI Black Spotted and Layla Metal Chrome
 OPI Black Spotted, yes..I dipped my fingers in oil!

What did I use?:  Ulta 3 Base Coat
                                                  Layla Metal Chrome - 1 Coat
                                             OPI Black Spotted- I Coat
                                   Seche Vite Top Coat

OPI Black Spotted and Layla Metal Chrome

OPI Black Spotted and Layla Metal Chrome

OPI Black Spotted and Layla Metal ChromeOPI Black Spotted and Layla Metal Chrome
Macro without and with flash 

OPI Black Spotted and Layla Metal Chrome
Black Spotted with Flash

So, do my nails look the picture with the instructions?
OPI Black Spotted and Layla Metal Chrome
I'll let you decide..

Thoughts on Black Spotted, do I love it, YES! It's awesome in an oily looking kind of way...it's so interesting. I was going for a blingy through the darkness look but I feel that because the Black Spotted doesn't "shatter" cleanly I got a bit of bronzish discoloration in the holes. I also think the size of the spottedness holes depends on the polish and as I had a majority of small ones I attribute this to the consistency of the Layla Metal Chrome. I can't wait to try this again over a few different polishes and see the results!

Love, meh or hate?

Thursday, 26 July 2012

OPI My Pointe Exactly with Pirouette My Whistle

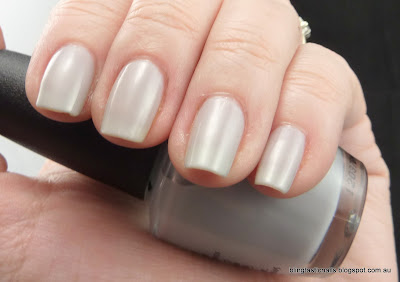
I have been pouring over the swatches of the OPI Ballet Collection for a little while and last week I finally got my grubby little hands on some of the lovely little sheer bottles of goodness. Yes, it was hard to decide on which to get. Yes, I got most of them! LOL. Tonight I am going to show you a swatch of My Pointe Exactly and Pirouette My Whistle.

OPI My Pointe ExactlyOPI Pirouette My Whistle
My Pointe Exactly and Pirouette My Whistle

OPI Pirouette My Whistle
Macro of Piroeutte My Whistle

OPI My Pointe ExactlyOPI My Pointe Exactly
 My Pointe Exactly without and without flash, this is 4 coats with no Top coat

OPI My Pointe Exactly
 Not so visible nail line!

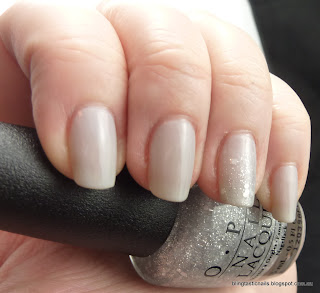
OPI Pirouette My Whilst and My Pointe Exactly
 Accent with Pirouette My Whistle

OPI Pirouette My Whilst and My Pointe Exactly
 Lovely silver glittery sparkle :)

OPI Pirouette My Whilst and My Pointe Exactly
Now, the whole point of a sheer polish is to be able to see your nail underneath the polish and have a visible nail line which may not be everyone's favorite thing. Most of the Ballet range are great for sheerness, but My Pointe exactly is a grey, and a sheer grey can sometimes look like dirty nails... so for this particular look I did 4 coats of polish to make sure there was some opacity. Piroeutte my Whistle is the glitter that goes with the whole collection and does look lovely for the accent nail, so much more shimmery and sparkly in real life :)

Have you got these sheer polishes in your collection?