Onto the product:
Camouflage Nail Polish Strips (Green/Brown)
As you can see there is 7 different widths of polish strips which you can measure against your nails and pick the right width. The pack comes with 2 sets of 7 polish strips, 5 for use on your fingers and 4 in case you have an application error (which is hard to to do!) or want to create some fun nail art with the extra strips.
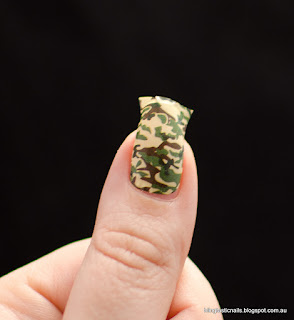
I chose to do 2 full nails with the polish strips, my thumb used the 14.5mm strip and my ring finger using the 11.5mm strip. I cut these out of the line they came in and as per the application instructions I didn't use a base coat on my nails. I removed the top layer of clear film, then peeled the sticker/polish strip off the non stick backing and lined up the rounded end of the sticker to the base of my nail near the cuticle and pressed down. I cut the polish strip close to the edge of my nail and kept the remainder of the polish strip to use later.
I then filed down the rest of the nail polish strip at the edge of my nail with a nail file, in a downward motion for the end result of this, nice and neat:
Now you can add a layer or two of top coat to protect the strip like you would a usual manicure :)
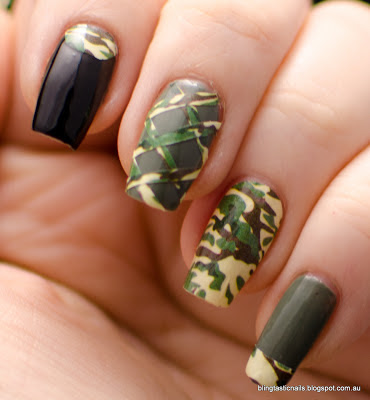
I applied the other polish strip using the same method to my ring finger..keeping the polish cut off remainder for this as well.I then painted my first finger with black polish, and my middle and little finger in a camouflage green polish. With the remainder of the polish strip I used on my ring finger I cut out a half moon and applied it to the top of my nail near the cuticle, as below.
AND I also added a strip from the remainder I had to my little finger, for a cammo french tip as below
With the polish strip left over from my thumb, I cut into 6 strips and placed it over polish on my middle finger in a criss-cross pattern
To create the over all look of this!
With Flash
With Flash :)
I was super happy with the end result and I only used 2 nail polish strips to do this manicure of 5 fingers! I liked that the instructions were clear and the polish strips seemed to suit my curved nails and fit well. The polish strips were quite easy to apply, and have a nice glossy finish. My nails are medium length and I had good coverage with enough left over to create some fun nail art. I can't comment on length of wear as I only applied them today!
OMG Nail Polish Strips can be bought here at Nail Polish Strips and the ones sent to me were the Camouflage Nail Polish Strips which are $6.89. There are some more fun designs from the last time I looked and the good thing is that shipping is free worldwide, and at the moment you can pick 4 packs of Nail Polish Strips for $20.


.jpg)


No comments:
Post a Comment