Showing posts with label Bundle Monster. Show all posts

Sunday, 19 August 2012

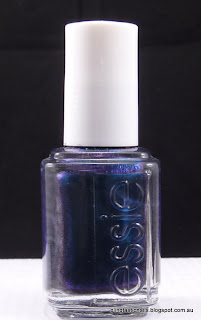
Essie Dive Bar- Gradient and Stamping :)

As promised this is where the mani went after I applied Essie Dive Bar. I admired her for a day, then decided I would do a gradient. I was going to make her firey red at the tips but then thought I would go more subtle by piling on the blue. So, for the gradient I used Essie Dive Bar as the base, Dive Bar at the top of the gradient, China Glaze Rodeo Fanatic in the middle and OPI Swimsuit, Nailed it! at the tips. 

L-R Essie Dive Bar, China Glaze Rodeo Fanatic and OPI Swimsuit, Nailed It!

 Gorgeous Blue Gradient!


 Just love how the graduation looks here :)


Without Flash

With Flash! 
Now for the stamping portion of this program! For the stamping I used China Glaze Millennium and a mixture of Cheeky, Bundlemonster and Mash plates. I applied China Glaze Wireless Holographic top coat to 2 of my fingers for a bit of changeup.

Left Hand- Love!

Left Thumb
Right Hand

Right Thumb

Dark Blue in this light


Lighter Blue in this light

Gradient with Flash!
I am super in love with how this turned out! The blue gradient was really pretty and whilst the stamping was a bit OTT, I LOVED it. Haven't stamped up a storm in ages. My girlfriend said her fav finger was the stars one in the pic above but I loved the overall look of my left hand in the very first pic. I love how you can create a mani that is just so different depending on how you look at it. Makes it hard to just go back to a single polish!

Hope you liked the gradient/stamping! Now I am off to work to save lives....or something, LOL.

Monday, 6 August 2012

China Glaze Fast track with Stamping!

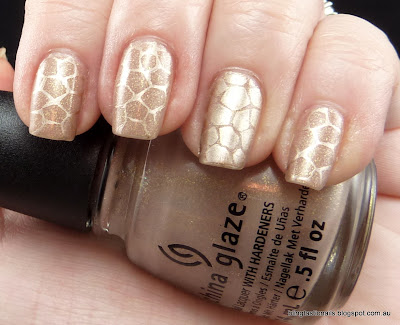
Today I have a work look for you that is far from boring. I was looking for a beige with bling and of course remembered that China Glaze Fast Track from the Hunger Games collection fitted the bill perfectly. After wearing this color all day I was trying to decide if it suited my skin tone. I'm still not sure! Although after stamping using China Glaze Passion has made me love this mani to the max :) On to the pics..

China Glaze Fast TrackChina Glaze Fast TrackChina Glaze Passion
China Glaze Fast Track without and with flash and China Glaze Passion

China Glaze Fast Track
 Fast Track with Top Coat, quite Gold from the flecks in this light

China Glaze Fast Track
 Fast Track, quite beige-y in this light!

 The flash brings out the gold shimmer/flecks :0

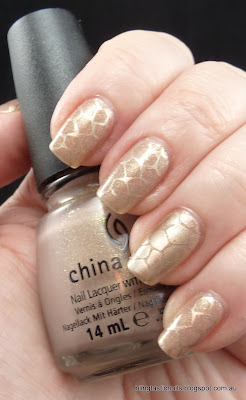
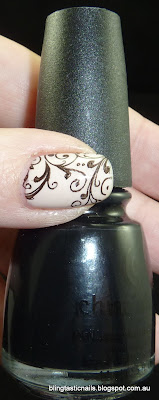
Now onto the stamping. I used China Glaze Passion and BM 313 plate, no top coat.
China Glaze Fast track with gold stamping

China Glaze Fast track with gold stamping

China Glaze Fast track with gold stamping
 Gold stamping blingyness!

China Glaze Fast track with gold stamping

This is a fairly straightforward look, but with a twist :) China Glaze Fast Track is a gold flecked beige which isn't everyones cup of tea but I do think I like it after seeing the photos. The shimmer makes it a little hard to photograph though! Passion doesn't look much in the bottle (not even very gold) but stamps awesomely and comes up gold blingy and is my go-to gold at the moment. The BM 313 plate has the "giraffe" pattern as I call it and the reverse "giraffe" pattern as you can see on my ring finger which gives the accent nail and more coverage in the stamping color. I love how you have both on the plate and the design was super easy to use.

Have you got the 3rd set of Bundle Monster plate? Is China Glaze Fast Track your thing?

Wednesday, 27 June 2012

Ulta3 Allure with Glitter and Bundle Monster stamping

Jas's Blingtastic Nail Blog Pic
Hello new Bundle Monster stamping plates!

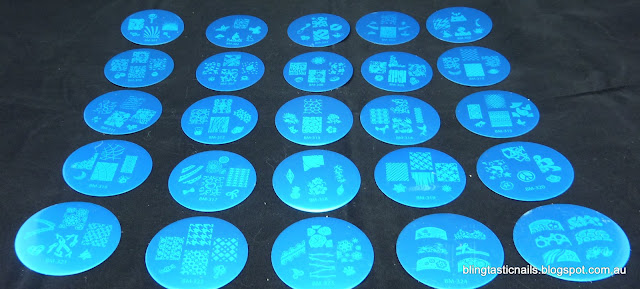
Woot, new nail plates! Stamping plate geeks will all have ordered their Bundle Monster plates on June 20th when they were released and today (7 days later) I have received mine :) The new plates were eagerly anticipated by many including myself. I ordered mine from the Bundle Monster website as they were available there first, but I do  believe Amazon also sells the plates.
So what do they look like? They come in a cute package and looks like this:

Bundle Monster 2012 stamping plates
As the package says, it has 25 plates with backing paper as per the last set of Bundle Monster Plates, when I open the packet I did so with caution after being warned that they edges were hella sharp. YES, they are sharp and even through careful handling I took some skin off. Blerg! Nothing that drew blood but do be careful. The plates come with a blue plastic coating, as shown below. Hint No1. Take the Blue Plastic off! Obvious to the old hat stamper but not always the new comers to they joys of stamping.

Bundle Monster 2012 stamping plates
With Blue Plastic

Bundle Monster 2012 stamping plates
 Without Blue Plastic

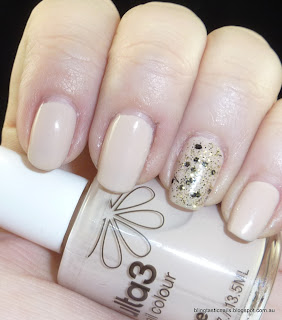
Of course, I had to give these plates a quick go, so I decided on a beige mani base with a glitter accent finger on either hand and then various black Bundle Monster stamping designs.

I used Ulta3 Base Coat, Ulta3 Allure and on my ring finger one coat of Nubar Black Polka Dots and one coat of Ulta3 Gold Digger.

Nubar Black Polka Dots, Ulta3 Allure and Ulta3 Gold Digger
L-R, Nubar Black Polka Dots, Ulta3 Allure and Gold Digger

Nubar Black Polka Dots, Ulta3 Allure and Ulta3 Gold Digger

Nubar Black Polka Dots, Ulta3 Allure and Ulta3 Gold Digger
 I really liked this mani on it's own without the stamping!

For the stamping I used China Glaze Liquid Leather. Here is how it turned out (Click the pictures for a close look at the designs)
Bundle Monster 2012 stamping art
Left Hand without Flash

Bundle Monster 2012 stamping art
 Left Thumb with Flash

Bundle Monster 2012 stamping art
Right Hand stamping without Flash


Bundle Monster 2012 stamping art
 Right Hand Stamping with Flash
I think my right hand was the favourite with the birds design on the thumb, the barb wire design on the middle finger and the newspaper print design on my index. So did I love these plates? At first glance, yes! There are a great variety of stamps, from Easter to Halloween, swirls, puzzle pieces, Owls (how awesome is that!), devils and as always some flower designs.
Are the plates easy to use? Apparently the second generation BM plates were on the difficult side. I didn't have any troubles with them. The 3rd gen plates seemed to scrape easily and transfer quite well onto the stamp. To stamp the designs onto my nails as above took me around 2 hours. Is that long you ask, grrr yes! It took me forever for me to be happy with the design transfer on my nails I had to redo the polish on 2 of my nails 3 times! I just couldn't get things to line up or the design didn't look quite right on my shortish nails. The barb wire design on my middle finger I had to put each line on individually or it looked strange. The other middle finger was difficult to get just the right amount of design in the right place to look good.

I am calling all my difficulties operator error at the moment and reserving judgement until next time I use these plates due to working a 10 hour shift and not eating dinner before attempting the stamping (I was too excited!)

Hope you like my first attempt at a few of the new Bundle Monster designs, will you be getting them? Or if you have the new plates, how do you find they stamp?
Wednesday, 20 June 2012

Kleancolor Coffee Addict

Can I just say first, it's been a day. I am sitting here with one of my cats making my lap toasty and my inclination to get up and do anything is very low. My brain has been fried by my very full 10 hour shift, but I do have enough brain energy left to think about how Floam would look in a jelly sandwich and that I really should give that a go on my designated Floam Friday :)
I also just watched The Nailasaurus You Tube's that she has done about questions people ask her. Her accent is divine and you can see she just loves polish and is a perfectionist. Her technique and art is awesome and I want to have cuticles like her when I grow up! The bloopers are hilarious...I think she laughs like me, LOL, so go check her out if you haven't seen her blog.
he other excitement for today is that the new Bundle Monster plates were released and like every other polish stamping lover I have ordered my set and will wait with eagerness to try some fabbo new designs. I wish a could design a stamping plate with cute medical related designs....I can see it in my head now! Orright, enough babble..onto Kleancolor goodness..

Kleancolor Coffee AddictKleancolor Coffee Addict
 Kleancolor Coffee Addict without and with flash

Kleancolor Coffee Addict
Gold with brown coffee tones?
OR

Kleancolor Coffee Addict
Coffee brown with Gold tones?

Kleancolor Coffee Addict
Coffee Addict with flash highlights the metallic shimmer effect

Kleancolor Coffee Addict was applied in one, yes, that is one coat over a base coat. The coverage is just awesome but drying time is the one let down although I am willing to live with it for the colors they have (oh and a quick dry top coat does wonders). Coffee Addict would make a great stamping polish and I like the more muted tones for winter.

Hope you liked my swatch of Coffee Addict and sweetaholic-beauty has informed me that Beautyjoint.com sells Kleancolors for $1.75 but I don't know how much postage it!

Saturday, 9 June 2012

Girly Bits Razzle Dazzle with Stamping

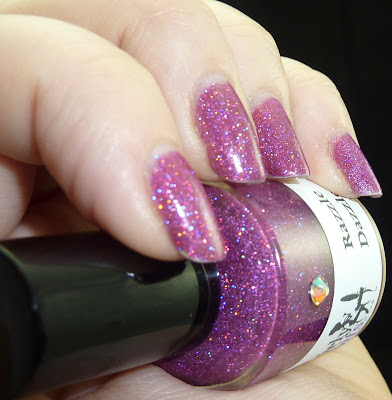
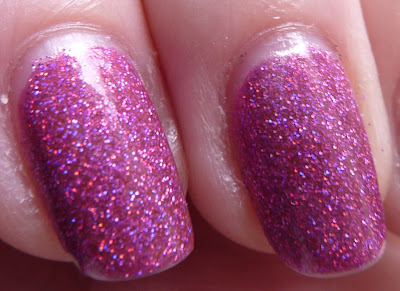
Feeling a bit on the down side today, I guess winter doesn't agree with me that much but in an attempt to cure my drabness I decided to put on the blingiest polish I could find amongst my nail mail and that would be Girly Bits Razzle Dazzle! Of course since this polish is just so bright and blingy it's hard to photograph but I did the best I could. I would describe this polish as an electric pink glitter with very fine blue/holographic glitters throughout. It looks fuchsia in plain light and really blings in fluro light.

I've instagram-ed an "artistic" shot..hmm..rasberry bling!
I started with China Glaze Awakening underwear, 2 coats of Razzle Dazzle and Top Coat of Seche Vite

Girly Bits Razzle DazzleGirly Bits Razzle Dazzle


 Regular light

Girly Bits Razzle Dazzle
 Extreme up Close bottle shots

Girly Bits Razzle Dazzle
 The blue is very noticable here


Girly Bits Razzle Dazzle


Girly Bits Razzle Dazzle


Girly Bits Razzle Dazzle
 Look at the awesome holo bling! Love it

Girly Bits Razzle Dazzle


Girly Bits Razzle Dazzle
A True representation of the color, kinda..it really is a very pink color!
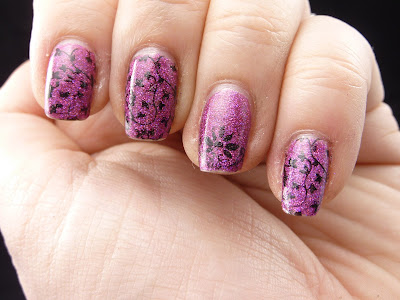
I then decided that I wanted to stamp over it and after trying multiple colors went with the bold stamp for most contrast since Razzle Dazzle is so out there! I used a QB plate and Bundle monster.

China Glaze Liquid Leather
China Glaze Liquid Leather Black for stamping

China Glaze Liquid Leather over Girly Bits Razzle Dazzle
 Bottle Shot with Flash


China Glaze Liquid Leather over Girly Bits Razzle Dazzle
Ring finger slight different, didn't need extra bling for an accent!


China Glaze Liquid Leather over Girly Bits Razzle Dazzle

So, I am overall pretty happy with how it looks although I don't love, love, love it.  It will stay on for the long weekend and then I will be looking at exploring more natural (read work appropriate!) looks. I haven't done a french mani yet so may attempt that :)