Showing posts with label OB plate. Show all posts

Sunday, 27 May 2012

Green and Blue Gradient with Stamping

I think that is all anyone has been saying on the nail polish blogs! I must admit the bandwagon was very tempting, so I took the leap and attempted my first Gradient Manicure tonight. I had read all about how to do it on the tutorial on The Nailasaurus Blog and had a look for a sponge that matched what she used. Unfortunately I didn't have any :( I did have some brand new round make up sponges that you put foundation on with, so thats what I used!

The colors I chose to gradient were Ulta3 Mojito, China Glaze Custom Kicks and China Glaze Towel Boy Toy.

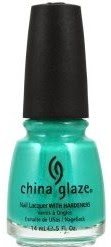
Here is the obligatory bottle pics!
China Glaze Towel Boy ToyUlta3 MojitoChina Glaze Custom Kicks


As per the Nailasaurus tutorial I put on 2 coats of the lightest color, Mojito, after Ulta3 Base Coat. I thought this would be easy to apply but it's was difficult as it dragged and caused bald spots if I wasn't careful. It turned out nicely though  and dried pretty quickly. I might put some thinner in for next use though!


Ulta3 Mojito Nail Polish

Then I tried to mix the 3 colors on a piece of baking paper and swirl with a toothpick as per the tutorial. This so didn't work for me with the sponge I had. So I cut my sponge in half and dampened the sponge to stop the polish bleeding through too quickly. Here is the sponge I had. I used the middle thin edge to stamp.


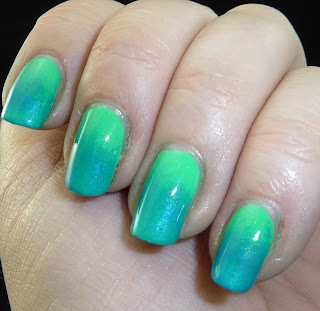
I then applied Mojito, Custom Kicks and Towel Boy Toy directly to the sponge in small stripes and just dabbed onto my nail with Mojito at the cuticle and the Towel Boy Toy at the end of my nail. I dabbed up and down and side to side until I was happy. I then cleaned my cuticles and applied Seche Vite as my top coat. Here is how it turned out:


Green to Blue Gradient Manicure


Green to Blue Gradient Manicure

Green to Blue Gradient Manicure
With Flash to show the creme to shimmer effect of the gradient

I am pretty chuffed at how it turned out for my first effort :) So of course I couldn't leave it as just the plain gradient manicure...stamping mayhem ensued and this was the end result:

Silver stamping over Green to Blue Gradient Manicure
 Left Hand Stamp-o-rama using Color Club Worth the Risque


Silver stamping over Green to Blue Gradient ManicureSilver stamping over Green to Blue Gradient Manicure


Left Thumb Stamp                                                                                        Right Thumb Stamp

Silver stamping over Green to Blue Gradient Manicure
Right hand stamping (excuse dodgy cuticles I did housework all day!)

I used a mixture of OB plates, Fun 2 plate and Bundle Monster plates. I finished off with Seche Vite top coat to seal in the stamping...and I can see from the photo of my right hand I really need to slather on the Lush Lemony Flutter Cuticle Butter. As a reformed nail/cuticle biter I am still trying to get my cuticles in much better shape!
Hope you liked my take on the gradient mani..turned out pretty well I think :)

Thursday, 24 May 2012

Pirate Thursday!

Today is Pirate Thursday, in case you didn't know. Okay, well, it's Thursday...and my manicure/nail art design this week is pirates therefore Pirate Thursday! Usually you have a black and white theme when you see pirate skulls on flags but dag namit I am going to present you with a red pirate theme mani..with bling of course!

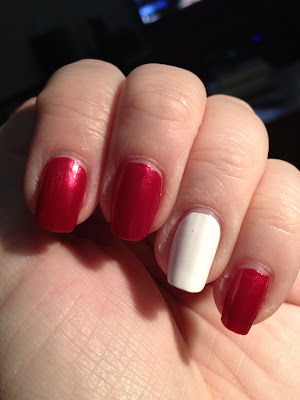
So, to start off I tried a Nubar base coat and decided to apply Kleancolor Red Heart (74) to all but my ring finger, and to my ring fingers I applied Kleancolor White (4).  Over the Kleancolor White I did a thin layer of China Glaze Rainbow which gives a blueish tinge in a certain light.


Kleancolor White and Red Heart


I then decided that the red needed some blinging up and put a layer of Kleancolor Red Hot (189) over the top.

Kleancolor Red HotKleancolor Red Hot
The picture on the left was how lovely it came out last night. I thought I would let it dry over night after the Kleancolor layering/melting off fiasco of last week and then this morning....the picture on the right is a big fat sheet imprinted mess on all the Kleancolor Red Hot layered nails. Bugger! :(

After a coat of Seche Vite though...things look much better! It filled in all the bedsheet imprints nicely. Yay!
Kleancolor Red Hot

Then onto stammmmmmmmpppppping..Pirate theme ahoy!
 (Gratuitous Artistic Instagram shot, shows how vibrant the red truly is.) 

Instagram red nail polish


                                        The Left Hand                                                       Left Thumb Design
Nail stamping art, pirate red and white themeNail stamping art, pirate red and white theme


                                           Right Hand                                                 Right Thumb Design

Nail stamping art, pirate red and white themeNail stamping art, pirate red and white theme

I used a mixture of plates, Bundle Monster, Fun Plate 2, MJ plate (both from Fab Ur Nails) and the OB plate I received the other day. I stamped with Kleancolor White and Sally Hansen White On quick dry. The Kleancolor was more opaque but harder to work with.

The 2 ring fingers (below) were stamped with Kleancolor Red Heart..it doesn't tend to stamp as cleanly as some and you have to be careful with the topcoat or there is bleeding. Wait for an hour or two for it to dry before the top coat! The blurriness you see is the stamp not the pic.

Nail stamping art, pirate red and white themeNail stamping art, pirate red and white theme


I finished the manicure off with INM Out the Door top coat. The glitter in the red hot layer really makes the polish look dynamic in the light...but not sure what to do about the layering/drying issue!

Hope you like my Pirate Thursday mani..it was challenging to get all the designs to stamp correctly with the new plates but I think I have the hang of it. Let me know your thoughts. Tomorrow Ulta3/Mode haul! :)