Showing posts with label Essie. Show all posts

Saturday, 3 May 2014

Essie Bikini So Teeny with striping nail art

Heya! It's me..again..here is one of my mani's that I wore for Austism Awareness month in April :) Essie Bikini So Teeny is one of those polishes that everyone raves about..or hates! The color is gorgeous, the formula seems to be a bit hit and miss for some. To be honest, I don't have any problems with Essie's formula but I do tend to have the bottles with the etched Essie logo and not the printed ones. I wonder if that makes a difference?
For this look I used 2 coats of Essie Bikini So Teeny and a top coat. I then added a simple cross of striping tape and filled in the triangle areas with different blue polishes. The top one is Girly Bits Blue Eyed Lawyer, the glitter is Picture Polish Splash, Essence Bonnie on the left hand side and the blue holo is Lilypad Lacquer Deep Blue Seeing.

Essie Bikini So Teeny with Girly Bits Blue Eyed Lawyer, Lilypad Lacquer Deep Blue Seeing, Essence Bonnie and Picture Polish Splash


Essie Bikini So Teeny with Girly Bits Blue Eyed Lawyer, Lilypad Lacquer Deep Blue Seeing, Essence Bonnie and Picture Polish Splash

Essie Bikini So Teeny with Girly Bits Blue Eyed Lawyer, Lilypad Lacquer Deep Blue Seeing, Essence Bonnie and Picture Polish Splash

Essie Bikini So Teeny with Girly Bits Blue Eyed Lawyer, Lilypad Lacquer Deep Blue Seeing, Essence Bonnie and Picture Polish Splash

I loved Essie Bikini So Teeny and had quite a few compliments on the color. I especially liked the Girly Bits and Lilypad Lacquer polishes that I used in the nail art and I can't wait to use them as more than just an accent! Hope you liked this look as much as I did :)

Sunday, 13 April 2014

L'oreal Miss Pixie with Cirque Magic Hour

Hey guys! Here is another blue mani for you for Paint It Blue month for Autism Awareness. I love blue so a month of it is no great hardship! Today I have for you a Jelly and a glitter..with a little stamping thrown in for good measure. I'm having a few personal stress issue at the moment, some mine, some my family, some my friends which means I haven't had time to sit down and just paint my nails, or plan to paint my nails. I still have polish happening but mostly just fitting it in around hospital visits, work, cooking paleo food and some sleep. On the upside I feel more active? Wierd huh. So this is my nails that I am sporting at the moment. L'oreal Miss Pixie which is a brilliant blue jelly- 3 coats for this look. A top coat of Circque Magic Hour and some puzzle stamping with Essie Penny Talk.
L'oreal Miss Pixie with Cirque Magic Hour and Essie Penny Talk stamping


L'oreal Miss Pixie with Cirque Magic Hour and Essie Penny Talk stamping


L'oreal Miss Pixie with Cirque Magic Hour and Essie Penny Talk stamping

L'oreal Miss Pixie with Cirque Magic Hour and Essie Penny Talk stamping

So, L'oreal Miss Pixie..love! Visible nail line, yeah, but so? Hehe. This was 3 coats and I probably could have done a 4th to make sure there was no VNL, but that was so not the point of having a jelly polish. Some fading at the tips with the polish but that is probably my application. Cirque Magic Hour has beautiful blue and copper flakie glitter in a clear base. I did have to add thinner to make the clear base less gluggy, but the glitters were easy to apply despite that. I matched up Essie Penny talk for my stamping and puzzle pieces were the choice of course! Hope you are ready for the week ahead..I wish there was more weekend than working week, LOL.

Sunday, 2 February 2014

Steampunk Nails- Twinsie Nails

 Hi guys, today I have for you a challenge that I did during the week with @cats_n_nails from Instagram. Natalia has been doing Twinsie nail manicure all week with different nail art chicks and I popped my hand up to try a bit of a challenge :)  Natalia was keen to re create/re-interpret a manicure by @mrslochness involving Steampunk, bling and cog stamping. Since I love the idea of steampunk and had some nail art watch bits, I was completely up for the challenge! LOL. As an aside, it's hideously hot here so stamping is a complete pain in the rear end..Essie Good as Gold is my go to stamping polish, but she was having none of it in the weather!  Anyways, here is the end result!

Essie Good as Gold with Aldi Five Star Bron-zite with Bundle Monster stamping and steampunk nail art.
Base coat- Essie Good as Gold and Five Stars Bron-zite. Stamping with China Glaze Passion, Swarovski studs and Nail art Watch pieces from Cherry Poppins.

Here is a side by side of my nails and Natalia's nails :)
Essie Good as Gold with Aldi Five Star Bron-zite with Bundle Monster stamping and steampunk nail art.


Essie Good as Gold with Aldi Five Star Bron-zite with Bundle Monster stamping and steampunk nail art.
I love how these watch pieces look :)

Essie Good as Gold with Aldi Five Star Bron-zite with Bundle Monster stamping and steampunk nail art.
 Gorgeous gold flecks in Five Stars Bron-zite! :)

Essie Good as Gold with Aldi Five Star Bron-zite with Bundle Monster stamping and steampunk nail art.
 Gah, not the best stamping effort..but the heat I tell you!

Super pleased with how these came out. I love the bronze gold flecked polish and the watch bits was really fun..and completely impractical. I would have top coated my little finger and hoped for the best if I had faith I wouldn't knock the nail art off. Since I am super clumsy I took the larger gold piece and the sharper bit on the bottom of my pinky off. The stamping was so difficult in regards to I was unable to pick up the polish from the design, stoopid heat. Anyways, it was worth the persistence. You can check out me on instagram if you like, I am @jasmsb or Natalia- @cats_n_nails :)

Thursday, 15 August 2013

Essie Bobbing for Baubles- Stamped and Fuzzy Coated

Hey guys, I feel so bad I have been missing in action. I worked EVERY day last week..and I know most people normally work everyday, but since I work 10 hour shifts and morning/afternoon shifts I was pooped most days! I have also been planning for a grand adventure with a girl friend to gallivant all over the USA. I might be a bit excited as it's 21 days out and I can't wait to go wine tasting in the Sonoma Valley, visit Yosemite National Park, see the Statue of Liberty, go to Disneyworld, have an Airboat ride in New Orleans and experience the wonder that is Las Vegas..a bit of downtime on the way home via Hawaii :) Anyways, I want to share with you something I did a while ago and forgot I had the pics.. Essie Bobbing for Baubles is an awesome dusky navy blue and I wanted to try one of my new Sally Hansen Fuzzy coats. I then attempted to match some stamping with it!
Essie Bobbing for Baubles with Sally Hansen Peach Fuzz and stamping
Essie Bobbing for Baubles with Sally Hansen Fuzzy Coat Peach Fuzz. Stamping with China Glaze Peachy Keen and Lemon Fizz. Scattered holo on one finger with China Glaze Fairy Dust

Essie Bobbing for Baubles with Sally Hansen Peach Fuzz and stamping


 Sally Hansen Peach Fuzz...I love bar glittah!

 Loving the navy blue with orange :)


This manicure was lovely and wintery and I really liked the navy/orange/yellow combo which I didn't expect. I love bar glitters and the fuzzy coats tick that box for me. I don't think the CG Fairy Dust added anything to this look so I should have skipped that! Essie's Bobbing for Baubles looked great on it's own and I am a bit sad I didn't get any pics of it on it's own..next time!
Thanks guys for hanging around with my sporadic posts..I will promise to try harder :) I will definitely be posting some haul pics and nail pics whilst overseas as well!

Saturday, 27 July 2013

OPI Honey Ryder Gold and Red Manicure

Hi guys, just a quick post of a mani I did the other day but I wasn't completely happy with my cuticles..but I loved the look I created so please ignore the crappy winter cuticles and focus on the lovely polish :) I wanted to create a bling but more than just texture that you get with the OPI Liquid Sand, so I used a combination of OPI Honey Ryder and Essie As Good as Gold with some stamping with my new Bundle Monster Holiday Plates to complete the look.
OPI Honey Ryder with Essie As Good As Gold with stamping China Glaze Heli-yum
LEssie As Good As Gold x 2 coats with China Glaze Heli-Yum stamping on first 2 fingers, 2 coats of OPI Honey Ryder on last 2 fingers.

OPI Honey Ryder with Essie As Good As Gold with stamping China Glaze Heli-yum
 With flash to show the brightness of the gold in Honey Ryder..so pretty!

OPI Honey Ryder with Essie As Good As Gold with stamping China Glaze Heli-yum
Closer look at the Bundle Monster stamping using the holiday plates with 'Chinese New Year' images.

OPI Honey Ryder with Essie As Good As Gold with stamping China Glaze Heli-yum

I really really loved how this looked in real life. I do hope it translates to you. OPI Honey Ryder was easy to apply and is such an interesting polish that you can't help looking and touching the finish. Essie As Good As Good was also easy to apply and relatively new-to-me Bundle Monster Holiday stamped easily and had quite a range of images in Chinese New Year Catagory :)
I have my work Xmas in July Christmas party tomorrow and I am looking forwards to having some fun and a few beverages. I'll post the look I went for on Sunday though so never fear. What did you think of the gold polish, yay or nay?

Saturday, 13 July 2013

Love Thy Polish Wildheart with Stamping

Good evening, it's a bit late on this side of the world and I'm typing this post as the rain pours down, with my cat sitting with me and watching the cricket. Tonight is a quick post, a follow on from the other day when I swatched Love Thy Polish's Wildheart. This was such a pretty polish that I couldn't resist adding some stamping with my new Bundle Monster Holiday Plates to see what cute designs they had! Also just to see that even though they are called Holiday Plates you can use them everyday :)
Love Thy Polish Wildheart with Essie Good as Gold stamping
This is Essie Good as Gold stamped over LTP Wildheart.

Love Thy Polish Wildheart with Essie Good as Gold stamping
 I stamped my thumb with the "Valentines/Love" plate..so cute!

Love Thy Polish Wildheart with Essie Good as Gold stamping
 The love birds are from the "Love" plate, the hanging bows from the "Baby Shower" designed plate and the little finger "Irish/St Patricks" plate

Love Thy Polish Wildheart with Essie Good as Gold stamping

 The shimmer and glitter of Love Thy Polish Wildheart really makes this a standout polish and a great background for stamping. This was so glittery and blingy that I didn't want to take it off. But alas my work sucks dogs balls about wearing polish. I do truly consider quitting daily because I feel so stifled and depressed. Nude is a great color, just not for the majority of my life! Argggggggggggh! Anyways..hope you're having a great weekend guys. I'm off to paint my nails a color that is not nude, LOL.

Wednesday, 22 May 2013

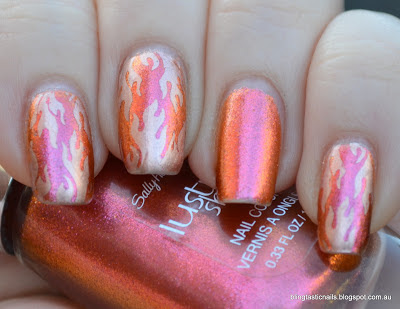
Sally Hansen Lustre Shine Lava with stamping

Hello all! It's cold down here in Melb..did I mention hate winter?? Anyways, I was wearing Sally Hansen Lustre Shine Lava the other day and loving it sick, but I wanted to make the polish last a little bit longer, so I thought..STAMPING :) I wanted to stamp with a color that contrasted but complimented the goldy/red color and Essie Penny Talk came to mind. I fossicked amongst my ever growing stamping plate collection and found some flames in my Wistona set that I thought would look pretty cool. Here is the result. 


Sally Hansen Lava Shine with Flame Stamping
 Sally Hansen Lustre Shine Lave with Essie Penny Talk, indirect light

Sally Hansen Lava Shine with Flame Stamping


Sally Hansen Lava Shine with Flame Stamping

Sally Hansen Lava Shine with Flame Stamping
 With flash

This is possibly not the most original combination,but you know what, it works for me :) Essie Penny Talk stamps wonderfully and give this a lovely brassy tone and the duochromatic nature of lustre shine Lava makes the flames almost glow. So I love it, of course! I already have purchased a back up bottle of Sally Hansen Lustre Shine Lava and Essie Penny Talk as I really like both separately AND together! Hope your week is going well. Have you bought any polish? I may have snuck in 5 or so to the stash today :)

Sunday, 12 May 2013

One Year Blogiversary and Essie In the Cab-ana Kitchen Sink Mani

What? I've only just clued on that it's been a year since my first blog post..time does fly! So 175 posts later and I still a passion for polish and blogging as well as learning so much about polish, indie polishes and nail art techniques. I've met some amazing polish makers, nail artists and just plain out nice people in the nail polish world that I am pretty happy to be a very small part of the community. 

Today I am going to do a comparison post (and cringe at my cuticles!) as I started to paint my nails to stop biting them. So I was pretty bad at biting my nails and cuticles. It's taken ages to get my poor maligned fingers into better condition. My very first pic was taken on my iphone. So will the current mani that I am wearing so we are comparing apples with apples. We all started somewhere!

So a pic from today :)
Essie In the Cab-ana with L-R, Striping and Kleancolor Metallic Sapphire, Striping tape and rhinestone, stamping with Kleancolor Metallic Sapphire and China Glaze Glistening Snow dots, French tip with loose glitter.

Blue Skittles Mani with silver stamping using Bundle Monster plates

Well, that wasn't so bad was it? Okay, if I am being picky with the comparison - my nails are longer, less cuticle flooding, better cuticle condition..I think my stamping was pretty good though back then! Helped that I unknowingly had one of the best stamping silvers with China Glaze Millennium :) 
I've been prattling about a Giveaway, I guess the celebration of blogging for one year should be a good a reason as any. As soon as I can get my butt into gear I will do it.. :)

Tuesday, 7 May 2013

Essie Jag-u-are with stamping- Wedding nails!

So, my week of insanity is over and I am on annual leave for this week..yay! I went to a lovely wedding on Friday just gone and decided on Essie Jag-u-are with stamping. The only problem was I didn't get to the stamping ON the night of the wedding. It didn't really matter as no one was looking at my nails, all eyes were on the bride. Luckily I did an awesome job on HER nails! LOL.  So, anyways. I got Jag-u-are on my nails for the wedding and after quite a few drinks and dancing that night I woke at 4.48 am unable to sleep. So I did the rest of the mani then..how cray cray am I?? Anyways, here is the result!
Essie Jag-u-are with stamping
Essie Jag-u-are with NerdLacquer Warrior Ethos accent and stamping

Essie Jag-u-are with stamping
This pic shows how the red can also look!

NerdLacquer Warrior Ethos
Up close and personal of NL Warrior Ethos, pretty iridescent shimmer!

Essie Jag-u-are and Nfu Oh 49
 Nfu-Oh 49 on my thumb!

Essie Jag-u-are with stamping
 Creative angle shot!
 This was pretty fun when I finally finished this mani :) Too bad I didn't finish it for the wedding, but I really wasn't too fussed by that. The wedding was great and the bride and groom looked lovely and I definitely had a great time! I have all this week to play with polish and I am soooo excited..I have cleaned the house a bit today, read some books..and chilled out. Soo excited!
Sunday, 14 April 2013

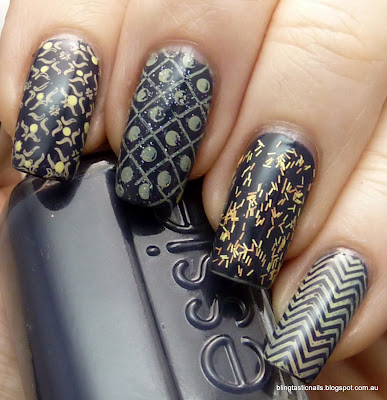
Sinful Colors Winterberry Stamped

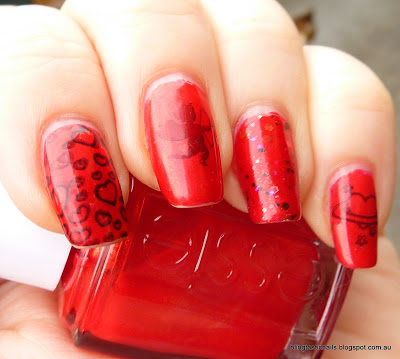
Sorry for the lack of posting..I will try and make it up with a few more post to catch up, and I have some nomination for  a best blogger award! Thank you so much for the girls nominating me:) I will make that my very next post. In the last week I have had a nail breakage, not complete nubbinization but they do look short to me after having nice long nails. This post is from just after I had Sinful Colors Winterberry on. I decided to stamp with Essie Penny Talk as I though they would go perfect together. I used my new Winstonia plates that I didn't order from the Winstonia website as at the time they didn't do international shipping, but I believe they do now. What I love about these plates is that they have reciprocal images of a design where you either get the outline of the image or the blocking around the image :)

Sinful Colors Winterberry with Essie Penny Talk stamping

Sinful Colors Winterberry with Essie Penny Talk stamping
Sinful Colors Winterberry with Essie Penny Talk Stamping

Sinful Colors Winterberry with Essie Penny Talk stamping

Sinful Colors Winterberry with Essie Penny Talk stamping

So what do you think about this combo? I personally think it looks very elegant and it was a super quick look to achieve. There was a bit of tip wear with Sinful Colors Winterberry by the time I stamped this, but I still think it looks pretty good. You have to be very close to notice all the flaws..luckily life is not a series of close ups! LOL.

Hope everyone is having a great weekend. I need to share my next Autism Awareness mani, a Northern Star polish I wore..and the Blogger Award questions..see you soon!

Friday, 29 March 2013

Essie Penny Talk with Enchanted Polish Tummy Time

Hellooooo...this post is going to be a straight forward one. Work tonight was crazy..it's true what they say about full moon and medical things going mental!  Metallic polish plus Glitter Polish equals a lovely blingy mani. This is how I particularly like my pedicures..it gives the polish a bit more depth and dimension. Today I paired Penny Talk with Enchanted Polish Tummy time..and here is the result. Warning..too many pics because I couldn't decide. Also, I mattified this look in some of the photos, can you tell the difference??
Essie Penny Talk with Enchanted Polish Tummy Time
Partial Sun

Essie Penny Talk with Enchanted Polish Tummy Time
 Shade with light reflected, gorgeous rose copper!

Essie Penny Talk with Enchanted Polish Tummy Time
 Full Shade

Essie Penny Talk with Enchanted Polish Tummy Time
 Macro- mattified :)

Essie Penny Talk with Enchanted Polish Tummy Time
 Full Sun

Essie Penny Talk with Enchanted Polish Tummy Time
 You have to love a holo heart! 

Essie Penny Talk with Enchanted Polish Tummy Time
Mattified!

Alrighty then. First of all what do you think of the combo? I had this on my nails and my mother asked for the same polish with an accent nail of the same glitter, LOL. The difference between the original finsh and Matte top coat was.. negligible really. It took the sheen off the brassiness of the polish slightly, but didn't significantly alter the glitter that I could tell! I will say the more I wear Essie Penny Talk, the more I love the color. Enchanted Polish Tummy Time was a great glitter topper. It's an intriguing combo of red micro glitters, black shards, holo hexes, holo bar glitters and holo heart and stars. *whew* The holo heart required a little bit of fishing but otherwise it was easy application.

Are you bored of Essie Penny Talk yet?? Should I keep going or just move along to a different polish? :)

Wednesday, 27 March 2013

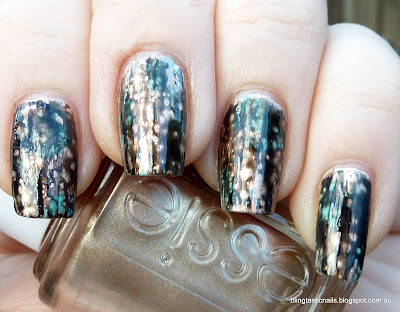
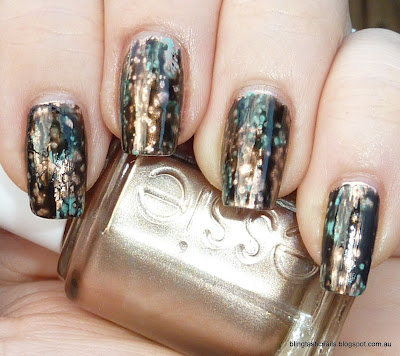
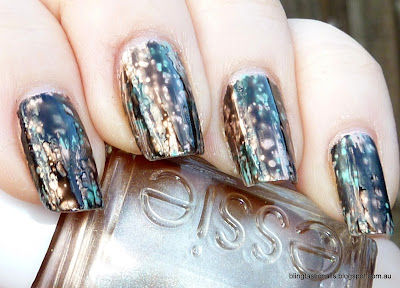
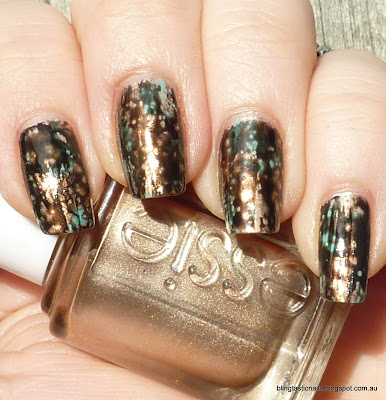
Essie Penny Talk and OPI Black Spotted

OPI Black Spotted over Essie Penny Talk and China Glaze For Audrey

Well, for Essie Penny Talk version 3.0 is for those who like their mani's a little bit darker but still with some bling in it. To mix it up a little I wanted to use OPI Black Spotted which is a bubble type top coat that was only release in Belgium last year! Of course I had to get my grubby little hand on it when it was released but lucky for people out there Layla cosmetics have come out with a version called Layla Bubbly. I saw it for sale on ozsale.com.au the other day,so keep an eye out for it. The other place I see Layla polishes are at Hairhouse Warehouse.


So, for today's look layered OPI Black Spotted over the Essie Penny Talk patina look. Black Spotted is a little tricky to apply. After my top coat of Poshe I waited until it was completely dry and applied a very thin layer of OPI Black Spotted. I think I was half successful with this look- the middle two fingers are my favorite!


OPI Black Spotted over Essie Penny Talk and China Glaze For Audrey
 Shade

OPI Black Spotted over Essie Penny Talk and China Glaze For Audrey
 Partial Sun

OPI Black Spotted over Essie Penny Talk and China Glaze For Audrey

OPI Black Spotted over Essie Penny Talk and China Glaze For Audrey
 Full sunlight

OPI Black Spotted over Essie Penny Talk and China Glaze For Audrey
 Full Sunlight
  
I this is kind a cool look! The contrast of colors work well, but I do prefer how it looks in the shade. I like the coppery color better than the golden tone you see in the full sunlight. This mani was definitely more  Now, you HAVE to top coat OPI Black Spotted. How do I know? Well I thought I would see how much wear and tear Black Spotted could take..and after just one day of not particularly arduous wear, this is what my Black Spotted/Penny Talk mani looked like:

 I actually thought this effect was rather interesting..in a creative artistic kinda way  :) So, what did you think of Black Spotted over Penny Talk? Love, like or loathe..I would love to hear your thoughts..