Showing posts with label Sally Hansen. Show all posts

Wednesday, 16 April 2014

Sally Hansen Big Matte Top Coat

Hi guys! Just wanted to post a quick review of Sally Hansen's Big Matte Top Coat which I bought from Kmart for $9.95 the other day. I seem to have a matte top coat shortage so wanted to see what this was like. Now since I already had on L'Oreal Miss Pixie with Cirque Magic Hour and some stamping, I decided to topcoat it and see how it looked. Now the Sally Hansen bottle says to top coat directly to the polish you have applied, but since I already wore this with Seche Vite for a few days I thought I would see how that goes! LOL.
So here is Miss Pixie and Magic hour after the application of Sally Hansen Big Matte Top Coat
L'Oreal Miss Pixie with Cirque Magic Hour and Essie Penny Talk stamping with Sally Hansen Big Matte Top Coat

And here is the original finish of Miss Pixie and Magic Hour with Seche Vite Top Coat
L'Oreal Miss Pixie with Cirque Magic Hour and Essie Penny Talk stamping


L'Oreal Miss Pixie with Cirque Magic Hour and Essie Penny Talk stamping with Sally Hansen Big Matte Top Coat

L'Oreal Miss Pixie with Cirque Magic Hour and Essie Penny Talk stamping with Sally Hansen Big Matte Top Coat

L'Oreal Miss Pixie with Cirque Magic Hour and Essie Penny Talk stamping with Sally Hansen Big Matte Top Coat

As you can see, the application of Sally Hansen Big Matte Top Coat certainly mattified the Seche Vite and the look of the polish underneath. The blue of L'Oreal Miss Pixie became more opaque and the glitters in Cirque Magic Hour became more pronounced at a tiny bit less sparkly, but not by much. They also look imbedded in the blue polish rather than floating on the top. I also like how the copper of Essie Penny Talk became more like used, dull copper :) I didn't think I would love the matte look as much as the shiny, and I don't..but I quite like it as a switch up, but not as my first preference. I had no trouble with application or dry time of the Sally Hansen Big Matte Top Coat and it wore very well for the 2 days I had it on!

Saturday, 25 January 2014

Sally Hansen Pool Party with Stamping and Glitter

So, yup, I had to fiddle around and made Sally Hansen Pool Party a base for a rocking mani. I also had inspiration from nail mail I received from Drama Queen Nails which included a new stamper, some neon round and square studs and the new Winstonia 2nd Generation stamping plates. Super quick delivery time can I say! So of course I wanted to play with the new studs and stamper. Here is what I came up with.
Sally Hansen Pool party with glitter gradient stamping and studs
First Finger- Sally Hansen Pool Party with Sally Hansen Hynautical and CrowsToes Absolum Your Potions Master Glitter Middle Finger- Stamping with Winstonia Plates and Lilypad Lacquer Deep Blue Lagoon, Ring Finger- Top Coat of Girly Bits Hocus Pocus and Little finger- neon blue stud

Sally Hansen Pool party with glitter gradient stamping and studs
Thumb has Glitter gradient use on first finger!

Sally Hansen Pool party with glitter gradient stamping and studs

Sally Hansen Pool party with glitter gradient stamping and studs

I did love Sally Hansen Pool Party when she was dressed up a bit more. It was a great base color for the holo topcoat of Girly Bits Hocus Pocus and went well with the glitter gradient, stamping and neon stud I accessorized with! Expect to be seeing a bit more stud action and the new designs of the Winstonia plates. I am going for an Australia Day themed mani for Monday, I have no clue what will happen, so wish me luck! :)

Thursday, 23 January 2014

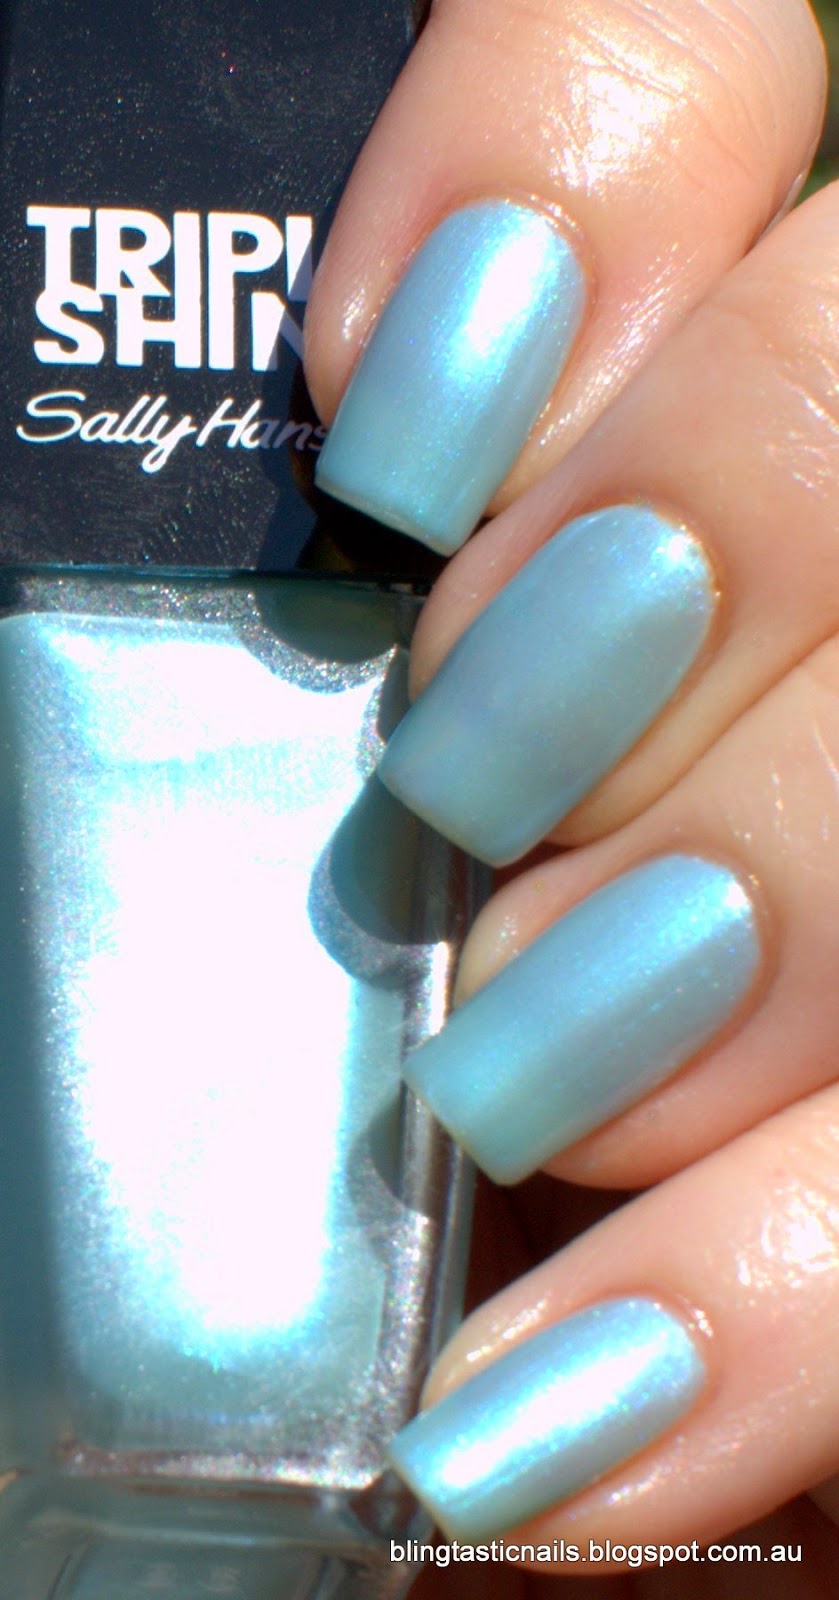
Sally Hansen Triple Shine Pool Party

So, I am not a massive fan of sheer polish..or frosty polish. But that didn't seem to matter when I had to buy the new Sally Hansen Triple Shine Pool Party! Pool Party is a light blue sheer polish with a blue sheen in the light and takes 3 coats for opaqueness. This is 1 more coat than I usually have time for. For anyone who knows me, I'm not the most patient person in the world. Anyways. This is 3 coats of Pool Party with top coat. The coats were quick and built up nicely :)


Sally Hansen Triple Shine Pool Party


Sally Hansen Triple Shine Pool Party


Sally Hansen Triple Shine Pool Party
 Slight visible nail line, but I wasn't doing more than 3 coats!

Sally Hansen Triple Shine Pool Party
 Slightly duskier blue and more opaque looking in the shade :)

So, do I love this polish? Nah..I do like it, but not love it. I like how the blue iridescent sheen saves this from being just another blue sheer polish. I don't look at my nails and go "this is awesome!"  It's just "nice". So I won't be wearing it as it..check back to see how I tiz this up. I purchased my Sally Hansen from Priceline on special, it was still $7 or so. Worth it...yeah, but only with a fast drying top coat that can handle 3 layers of polish AND with something else over it it! LOL.

Wednesday, 1 January 2014

Sally Hansen Drama Sheen and Happy New Years stamping :)

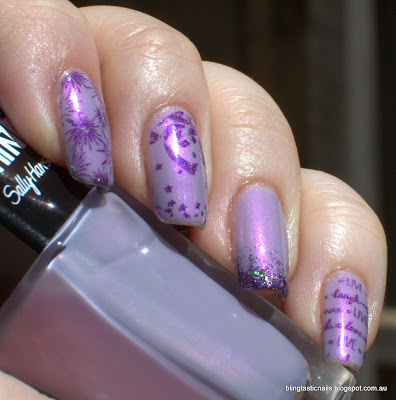
Well, it's New Years day and to be honest I always want NYE to be fabulous but it turns out to be more anticlimactic than anything! I worked from midday to 9pm NYE..saving lives and then a quiet night in watching some tv and having a few adult beverages. So I did a bit of a NYE manicure, but it wasn't a total success in my books. Lemme say, I purchased Sally Hansen Tripe Shine on sale..Drama Sheen. I love the color in the bottle. I don't love the 4 coats it requires to get to opacity. I did love it when it got to opacity, but then with a top coat and a base coat....tip wear was one day and massive. Ugh! So disappointed. So when I stamped I felt like I reviving a week old mani, not one done the day before. Maybe I should have waited a bit longer in between the coats or something, but ain't nobody got time for that. Whilst I a having a sook, the bottles of the Sally Hansen Triple shine, not the best for taking pics. So be warned unco looking pics ahead, LOL!

First of all, Sally Hansen Triple Shine in Drama Sheen
Sally Hansen Drama Sheen


Sally Hansen Drama Sheen

Sally Hansen Drama Sheen
 I love that this is a pretty lilac color with a pink sheen in the bottle and on the nail :)

Now for some NYE stamping and glittah.
Sally Hansen Drama Sheen with Color Club Wild at Heart stamping
Stamping with Bundle Monster Holiday plates with Color Club Wild at Heart and ring finger glitter gradient with Girly Bits Purple Potion. Accent glitter on first finger is China Glaze Glistening Snow.

Sally Hansen Drama Sheen with Color Club Wild at Heart stamping
 Color Club Wild at Heart is a lovely scattered holo and Girly Bits Purple Potion a pretty holo glittah :)

Sally Hansen Drama Sheen with Color Club Wild at Heart stamping
 I thought the pinky stamping with Live, Laugh and Love would be a good representation of the New Year hopefulness :)

Sally Hansen Drama Sheen with Color Club Wild at Heart stamping
 You can see the worst tip wear on the middle finger! I did use Seche as a top coat so might try a different one to see changes the tip wear.

So, Happy New Year! Hope you have goals and dreams to achieve, with a brand new year to make awesome things happen :) Do I have any resolutions? Nope..not really. To be happy is alls. If that means I have to eat better, sleep more, learn how to take better pics of my nails...then I'll work on those things, but not hold myself to ransom to do so. 
Ps. Day 1 of Carb detox is in progress though! lol.

Monday, 10 June 2013

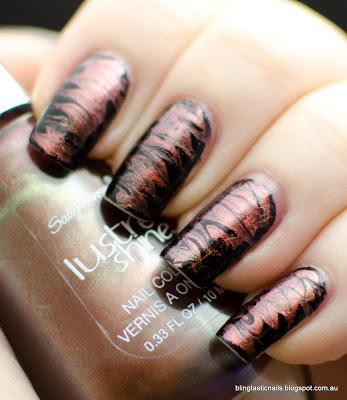
Sally Hansen Copperhead Drag Marble

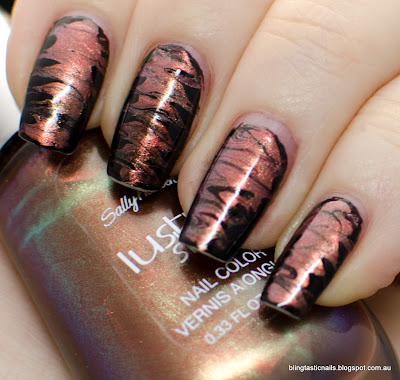
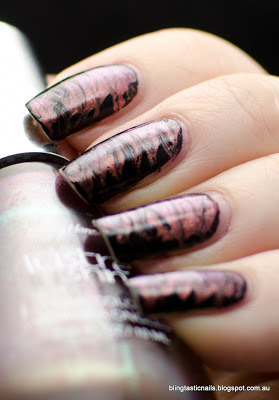
Hello everybodies! I have a quick post for you tonight inspired by Lab Muffin's Tortoiseshell Drag Marble and originally I was going to use different colors, but I thought..why not recreate the look with close as I can get colors! So for this recreation I used Sally Hansen's Lustre Shine Copperhead and A-England Lancelot. For the tutorial on how to do the drag marble look you can head over and check out Lab Muffins tutorial here
Sally Hansen Lustre Shine Copperhead

Drag Marble manicure with Sally Hansen Lustre Shine Copperhead and A-England Lancelot
Sally Hansen Copper head with A-England Lancelot

Drag Marble manicure with Sally Hansen Lustre Shine Copperhead and A-England Lancelot
With flash

Drag Marble manicure with Sally Hansen Lustre Shine Copperhead and A-England Lancelot


Drag Marble manicure with Sally Hansen Lustre Shine Copperhead and A-England Lancelot

I really like the look of the drag marble effect, you have to work quickly and be careful not to drag too hard or you end up with bare nail patches. I found the cleanup for Lancelot difficult on my ring finger..hence a bit more of a gap but otherwise the rest weren't too bad! Sally Hansen Copperhead was much more different on the nail than in the box, it was more copper/bronze which I loved. The duochrome can be seen as a duskiness and was more evident in person.
This was a super fun and quick look to do and looks amazingly difficult to do, but all you need is 2 polishes and a toothpick..will you be trying it?

Wednesday, 22 May 2013

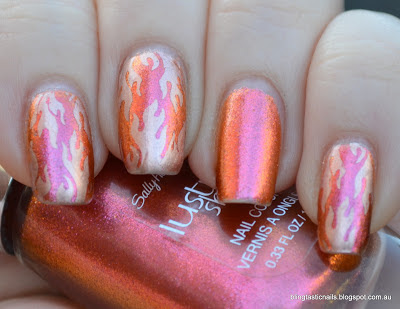
Sally Hansen Lustre Shine Lava with stamping

Hello all! It's cold down here in Melb..did I mention hate winter?? Anyways, I was wearing Sally Hansen Lustre Shine Lava the other day and loving it sick, but I wanted to make the polish last a little bit longer, so I thought..STAMPING :) I wanted to stamp with a color that contrasted but complimented the goldy/red color and Essie Penny Talk came to mind. I fossicked amongst my ever growing stamping plate collection and found some flames in my Wistona set that I thought would look pretty cool. Here is the result. 


Sally Hansen Lava Shine with Flame Stamping
 Sally Hansen Lustre Shine Lave with Essie Penny Talk, indirect light

Sally Hansen Lava Shine with Flame Stamping


Sally Hansen Lava Shine with Flame Stamping

Sally Hansen Lava Shine with Flame Stamping
 With flash

This is possibly not the most original combination,but you know what, it works for me :) Essie Penny Talk stamps wonderfully and give this a lovely brassy tone and the duochromatic nature of lustre shine Lava makes the flames almost glow. So I love it, of course! I already have purchased a back up bottle of Sally Hansen Lustre Shine Lava and Essie Penny Talk as I really like both separately AND together! Hope your week is going well. Have you bought any polish? I may have snuck in 5 or so to the stash today :)

Thursday, 9 May 2013

Sally Hansen Lustre Shine Lava

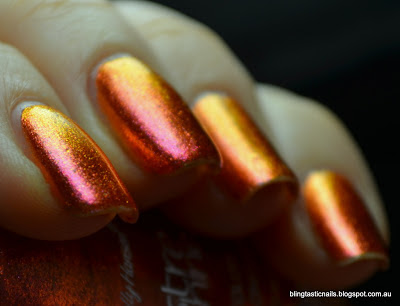
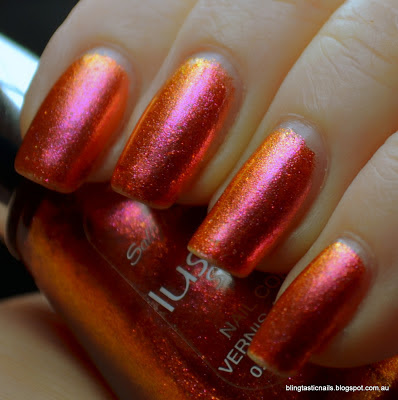
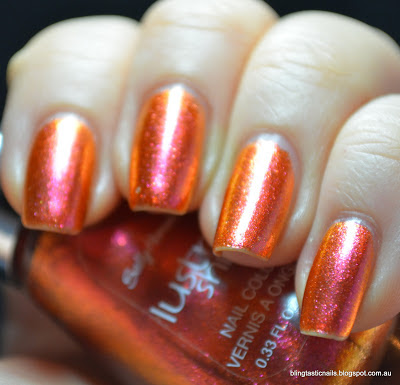
Hi guys! I've been playing with my husbands new camera and my lightbox to try and improve my inside pics now that winter is coming. Nothing like putting things through their paces with a nice and simple multichrome irridescent orange/pink/red polish to ease into it, LOL. I've been hanging out for this polish for a little bit but wasn't sure when they were coming to Australia but did resist ordering this one in particular online and picked this up a few days ago on special.

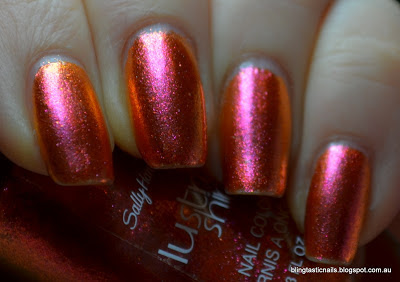
This is 2 coats of Sally Hansen Lustre Shine Lava with no top coat, sorry, there is like a gagillion photos because this polish is awesome!

Sally Hansen Lustre Shine Lava
Awesome on the nail

Sally Hansen Lustre Shine Lava
Awesome in the bottle!

Sally Hansen Lustre Shine Lava
 Dark Pink/Red in this light and also in full sunlight

Sally Hansen Lustre Shine Lava
Start of gold/orange shimmer

Sally Hansen Lustre Shine Lava
Pinky orange color shift

Sally Hansen Lustre Shine Lava
 Mostly orange shift!

Sally Hansen Lustre Shine Lava
Hmm, this photo is just cos :)

Sally Hansen Lustre Shine Lava
This is just cos as well!

Sally Hansen Lustre Shine Lava
Extreme close up of awesomeness

 So, are you in love with this polish yet? These pics show why I was lusting after it. The only issue I had with this polish is with clean up. The polish itself is made up of micro flecks suspended in the base, so clean up an be a bit of a pain as the micro flecks just scatter everywhere. Recommend careful application! There was no change to polish or the color after adding a top coat. You can get these from Priceline or Chemist Warehouse. Some of the other colors remind me of the China Glaze Bohemian collection, but a bit more accessible to most aussie chicks who love polish. China Glaze isn't widely known about here!

Wednesday, 11 July 2012

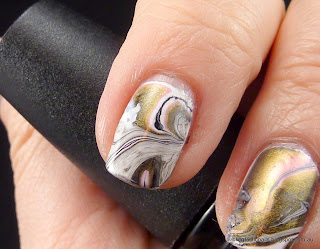
Kleancolor Salsa, Sally Hansen White Out and China Glaze Liquid Leather Watermarble

I stayed up wayyyyy to late last night and as a result of wandering around the internets and Youtube whilst watching North and South (Elizabeth Gaskell's book in TV mini series), I woke up this morning with an attitude of "I want to try water marbling, it looks great, lets give it a go". So, I sat there thinking about a color scheme that is work appropriate...looked at my bottle of Nostalgic As If! and decided I wanted to try a white, pink and black water marble :) I guess my hands will be in my pockets alot tomorrow!

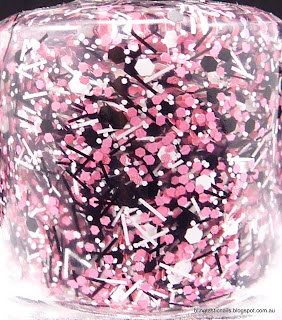
Here is my bottle of inspiration:
Nostalgic Lacquer As If!Nostalgic Lacquer As If!
Nostalgic As If! and macro of As If!

Sally Hansen White on, Kleancolor Salsa and China Glaze Liquid Leather

Here is the colors I chose to marble with were Sally Hansen White On, Kleancolor Salsa and China Glaze Liquid Leather.

 The way I water marbled was to use a very small glass ie. Sherry/port glass, similar to this size
It has a small water surface area, enough for 1 finger. I also used a toothpick, cotton bud and Micropore (Nursing tape) to create the effect. You can search you tube for great tutorial on the best was to water marble. I chose to tape around each nail to cover my finger and not get polish on my hands. This worked pretty well for minimizing mess and clean up. Not sure how regular tape would have done!

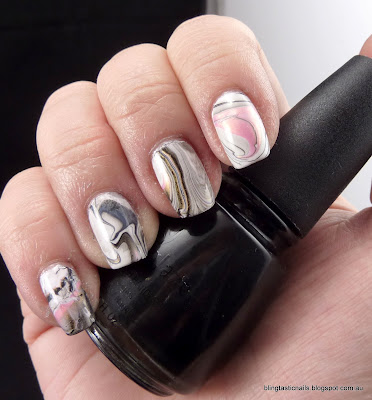
And here is the effect, the watermarble was done over Ulta3 base coat and 1 coat of Sally Hansen White on, topped with Seche Vite. Please ignore my dry cuticles!
Pink, white and black water marble effect mani
Left Hand Water Marble Effort

Pink, white and black water marble effect mani
Left Thumb

Pink, white and black water marble effect mani
 Right Hand

Pink, white and black water marble effect mani
Right Hand

Pink, white and black water marble effect mani
Right Thumb

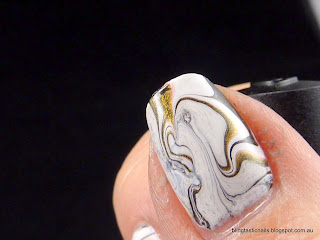
Here is a few Macro shots of the nails I particular like :)
Pink, white and black water marble effect maniPink, white and black water marble effect mani

Water marbling isn't that easy to get the design you want, it's messy but the clean up isn't too terrible for the end result. There are a few different methods, I was happy with the taping method and how the water marbling turned out :) Kleancolor Salsa turned out to be almost a 2 in 1 polish as the pink/gold shimmer seemed to separate in the water resulting in the bronze color you see in between the pink and black and I so glad that it happened, it made the mani really pop and blinged it up a bit! I did 2 nails over again as they had too much dark/black pigment with no swirly pattern.

Overall I was pretty chuffed with how my first attempt turned out. Hope you liked this mani and have had a go at water marbling, it's pretty fun!