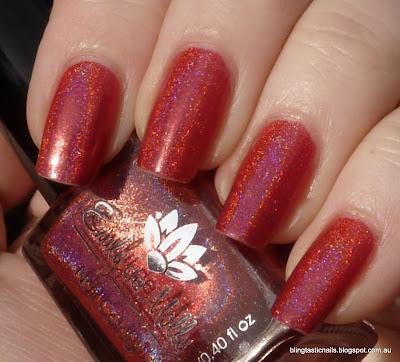
Hello, hello! I am slowly but surely catching up with Untried May month..Today I have one of 2 post, and this is for May the 5th- Red! I have already done a red jelly on 2nd of May but I couldn't resist these reds by Pretty Serious. Today I have for you Pretty Serious Hell on Wheels with an accent nail of Vicious Vampire. Pretty Serious Hell on Wheels is a gorgeous vibrant red and for this swatch I used to 2 coats with top coat.The accent nail was also 2 coats with Vicious Vampire and a top coat which matched Hell on Wheels so well in vibrancy but has blue flecks and red glitters throughout :)
Come to the darkside of the polish world, where there is never enough polish, nail art or glitter!
Showing posts with label Red. Show all posts
Showing posts with label Red. Show all posts
Wednesday, 7 May 2014
Pretty Serious Hell On Wheels and Vicious Vampire- Red for Untried May
Labels:
Flakie,
Glitter,
Pretty Serious,
Red
Sunday, 4 May 2014
L'oreal Jolly Lolly- Jelly for Untried May
Hi guys..this is my 2nd post to try and catch up for Untried May :) I'm going to try and have a post for each day of the month, see how that goes! The 2nd of May is an untried Jelly polish in Amy's Untried Challenge, so this is going to be a quick post as it's already late here. Today have a straight swatch for you of L'oreal Jolly Lolly which is in the set of squishy jelly L'oreal polishes released a little while ago. I was a bit slow on the uptake when it came to jellys/leadlight/sheer polishes but I really love Jolly Lolly..so red and squishy! This is 3 coats with no top coat.
I really loved this color. I am coming to terms with coping with a visible nail line and I don't mind it as much as I used to. The formula and clean up was really good and the vibrant red color is amazing. I bought mine from Ebay as I totally missed the trend here in Australia. Sometimes I am not thrilled with a trend and regret not picking up the colors, like in this case..not so sure it will be the case with the new OPI Neon collection coming..
Sunday, 2 March 2014
A-England Briarwood
Hey guys! Its the end of the weekend for me and I can tell the week ahead is a doozy. It's always that way for me when I have holidays coming, holidays next week, yay! So today I have for you one of the newer to me A-England polishes with Briarwood. Briarwood is a burgandy/brown shifting polish with scatter holo. This color is definitely an Autumn color and although I am in denial about summer being over, officially its Autumn, boo :( This is 2 coats of Briarwood with top coat.
In the shade this polish is a burgandy/maroon shade..and the lovely flashes of red come out in the sun. The holo does come out and play under artificial lighting but makes the polish turn brown, often making this polish look a bit darker than it really is. The sun definitely brings out the best in the polish but it so interesting to wear and the holo does make this so fun :)
A-England Briarwood- full sunlight
Holo and color shift
A-England Briarwood in the shade and full sun
Gratuitous final shot of burgandy/red/brown holo goodness
Labels:
A-England,
Holographic,
Red
Saturday, 15 February 2014
Black Cat Lacquer Bloody Kisses and piCture pOlish Scarlett
Hey guys! Having a difficult week, so a quickie for today. I had my computer rebuilt which has resulted in a lack of posts so I hope I can catch up with another post or 2 in the next few days. Today I have for you a variation on the Valentines Day mani I did on Monday, which switched up with an accent nail of piCture pOlish Scarlett with stamping. I think I prefer this version!
Okay, I hope you are having a great weekend. I'll try and catch up with some more interesting swatches and nails of the day for the rest of the week :)
Okay, I hope you are having a great weekend. I'll try and catch up with some more interesting swatches and nails of the day for the rest of the week :)
Labels:
Black,
Black Cat Lacquer,
Glitter,
Red,
Stamping,
Valentines Day
Sunday, 12 January 2014
Essense Fame Fatale with Leopard Print
Ah, the weekend, why you no longer? Feeling a bit tired after a busy weekend, could do with another day off to be honest! Today I have for you nails that I wore last night that matched my dress. It was a friends birthday and we went to a fancy restaurant. So of course I had to do the matchy matchy nails. For this particular look I used a base of Essence Fame Fatale on all my nails except the ring finger where I used China Glaze I'm not a Lion. I stamped leopard print on my ring finger with black and then tried a half stamping of flowers in gold with accent glittery bits. It was a different look for me and I quite enjoyed it!
2 coats of Fame Fatale and I'm Not a Lion with topcoat
Completely love the holo glitter!
I probably should have filled in some of the "prints" in the Leopard print?
This matched my dress which was leopard and floral..sounds weird but isn't! Promise! I don't really want to take it off, but needs must with work tomorrow. Ah well..have a great week people :)
Labels:
China Glaze,
Essence,
Glitter,
Gold,
Holographic,
Red
Wednesday, 25 December 2013
Christmas Red and Gold Bling Manicure
Merry Christmas! Today is Christmas Day and here is what I wore today for Christmas with my family and is for tomorrow for celebrations with my husbands family tomorrow. I started with the base of Dance Legend New Messiah I already had and blinged things up with gold and red to match my dress.
So here it is
Gah! Too many photos but it was so pretty and shiny! Anyways..the blingy made me happy and I had a great Christmas day but ate far too much of course. I could have done with a nanna nap! Anyways, Christmas continues for me tomorrow and then back to work on Friday ..nawhh.
So here it is
First finger is a dotticure with Essence Fame Fatale and OPI You Only Live Twice, Middle finger has stamping with OPI You Only Live Twice, Ring finger has Candeo Colors Old Gold and the Pinkie has OPI Honey Ryder.
My thumb had stamping with OPI You Only Live Twice :)
Christmas Bling!
Labels:
Candeo Colors,
Christmas Nails,
Essence,
Gold,
OPI,
Red
Sunday, 22 December 2013
It's Christmas! Christmas Skittles mani :)
Okay, so it finally feels like Christmas for me! I have had my Christmas nails on, have watched one of my first Christmas movies that I always watch at Christmas..Terry Pratchett's The Hogfather and I am finally getting around to wrapping presents, well the 4 presents out of like 20 I only have :)
We have been doing some home improvements..air conditioning, curtains, sheers, window tints to try and get ready for a hot summer....and today is raining but hot..nice summer weather where are you? Christmas day is always hot and sunny in Australia, and I am sure it will pull through this year.
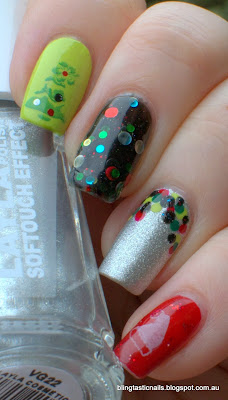
So, here is my Christmas skittle nails I did...a little bit of Christmas on each finger. The first finger is Essence L.O.L with Bundle monster stamping in Essence The Green and the Grunge. The middle finger is KBShimmer Strung Out, Ring finger is Layla Soft Touch Marshmallow Twinkle with dotting in various different colors and the little finger is Essence Fame Fatale with Bundle Monster stamping. My thumb had a green sweater stamping look using Essence The Green and the Grunge with bundle Monster stamping which you can see on my left hand later!
Here is my left hand which used the same skittles colors but my first finger with the Essence and Bundle Monster stamping.
Left hand- first finger has Essence The green and the grunge with Bundle monster stamping in Essence Icy Princess. Yay! Another nice stamping silver. Love how this tree came out :)
Now I had no sun to take these photos in, but I still think these look pretty and christmassy. People commented on the lime green nail with the tree and the sweater look dark green nail. My personal fav is the red Santa hat nail and the KBShimmer Strung Out! LOL.
Hope you are having a great weekend and not too must last minute Xmas shopping like I have to do!
Labels:
Bundle Monster,
Christmas Nails,
Green,
Red,
Silver,
Skittles
Friday, 30 August 2013
Emily de Molly Seeing Red
Hi guys, TGIF! I never thought I would make it through the day and to be honest I am not sure I have yet, LOL. I have a million things to do and not really sure which way to run first, I have birthdays, meet ups, beauty appointments, osteo..and finalization of travel stuff...and then there is packing. I need to let me mind settle it seems, too many hummingbirds in it! Anyways, here is something gorgeous I wore the other day, it's Emily de Mollys Seeing Red. I was in the mood for bright and pretty and this certainly fit the bill. It's amazing how pigmented it is..I used only one coat! See what you think..
What do you think..do you love or love love it? :)
One coat of Emily de Molly Seeing Red
Gah! Such a gorgeous holo..luffs so much!
Even in the semi shade..it blings :)
Fully sun, but a bit too sunny I think..hehe
I got so many compliments on this, its so elegant but also so interesting with the strong holo component. I used only one coat for my mani and had great coverage. I found this super easy to worth with and applied wonderfully. I love Emily de Molly, and you can get your hands on her gorgeous polishes here: Etsy Store and Femme Fatale Cosmetics.
What do you think..do you love or love love it? :)
Labels:
Emily De Molly,
Red
Saturday, 27 July 2013
OPI Honey Ryder Gold and Red Manicure
Hi guys, just a quick post of a mani I did the other day but I wasn't completely happy with my cuticles..but I loved the look I created so please ignore the crappy winter cuticles and focus on the lovely polish :) I wanted to create a bling but more than just texture that you get with the OPI Liquid Sand, so I used a combination of OPI Honey Ryder and Essie As Good as Gold with some stamping with my new Bundle Monster Holiday Plates to complete the look.
I really really loved how this looked in real life. I do hope it translates to you. OPI Honey Ryder was easy to apply and is such an interesting polish that you can't help looking and touching the finish. Essie As Good As Good was also easy to apply and relatively new-to-me Bundle Monster Holiday stamped easily and had quite a range of images in Chinese New Year Catagory :)
I have my work Xmas in July Christmas party tomorrow and I am looking forwards to having some fun and a few beverages. I'll post the look I went for on Sunday though so never fear. What did you think of the gold polish, yay or nay?
LEssie As Good As Gold x 2 coats with China Glaze Heli-Yum stamping on first 2 fingers, 2 coats of OPI Honey Ryder on last 2 fingers.
With flash to show the brightness of the gold in Honey Ryder..so pretty!
Closer look at the Bundle Monster stamping using the holiday plates with 'Chinese New Year' images.
I really really loved how this looked in real life. I do hope it translates to you. OPI Honey Ryder was easy to apply and is such an interesting polish that you can't help looking and touching the finish. Essie As Good As Good was also easy to apply and relatively new-to-me Bundle Monster Holiday stamped easily and had quite a range of images in Chinese New Year Catagory :)
I have my work Xmas in July Christmas party tomorrow and I am looking forwards to having some fun and a few beverages. I'll post the look I went for on Sunday though so never fear. What did you think of the gold polish, yay or nay?
Wednesday, 5 June 2013
piCture pOlish O'Hara Stamped- AN Monday
Hi everyone! I am a little bit late for this post..but I did do this look on Monday for Aussie Nails Monday. This weeks AN Monday the theme was "Hearts" and since I had just received my piCture pOlish order I was pretty keen to try out one of my new pretties. Calling out to me was the awesome o'hara, o'hara is the hottest gorgeous red polish with sparkles of holographic goodness that I just love!
piCture pOlish o'hara, 2 coats with 1 coat of Seche Vite.
So pretty!
I then stamped with China Glaze Pink-ie Promise, Something Sweet and Color Club Miss Bliss in a graduation of pinks over the nail :)
Picture taken in lightbox
Dodgy pic with flash for holo goodness :)
Who doesn't like hearts and crosses? The pirate way to wear hearts, LOL.
This was a simple but elegant way to wear hearts without being too girly :) piCture pOlish o'hara had a great formula and was just so gorgeous! I had been waiting for all the various shades of piCture pOlish that I wanted came into stock and ordered their fabulous everyday deal which meant 2 free polishes. Who doesn't love something for free? I purchased my piCture pOlish directly from their web site here for the Aussie girls but international chicks can hit up Llarowe.
Labels:
China Glaze,
Color Club,
Hearts,
Holographic,
Picture Polish,
Red
Sunday, 1 July 2012
Ulta3 Pepper Pot with MASH stamping
Sorry for the super slackness of not posting yesterday, work so interferes with life sometimes! So to make it up, I will show you Ulta3 Pepper Pot with MASH stamping in this post and in the next, some awesome Nail Mail :)
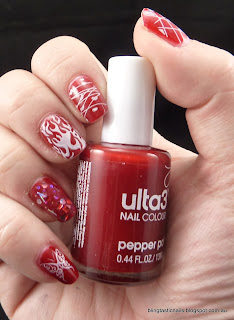
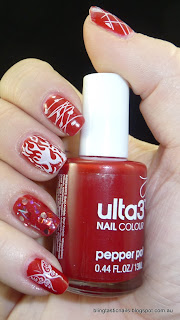
Onto the Pepper Pot mani..I wanted to have a go at my new MASH plates that I received this week (along with my Bundle Monster and Red Angel plates). I ordered both the older and new MASH plates and thought Pepper pot would make a good back ground. The surprise of using Pepper Pot was that it was pretty thick and a jelly! I did thin it out a bit, but it was still very difficult to work with, bleh :( I am also not loving my cuticles or nails at the moment, I blame winter.
Ulta3 Pepper Pot with and without flash
Right Hand with stamping using MASH plates, loving the flames :)
Right hand without and with flash
Right thumb with stamping, it looks cool doesn't it?
Left Hand stamping on my Iphone
This was just a quick fun mani, just to try the stamping plates, so I'll have something less random next time! Hope you are all having a great weekend, extended for me..the joys of shiftwork :)
Sunday, 3 June 2012
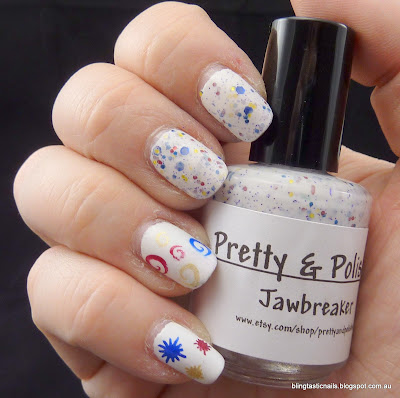
Pretty & Polished Jawbreaker with Stamping
Today's challenge for me was that I wanted to use Pretty & Polished Jawbreaker as the basis for my mani but I didn't want it to be just about Jawbreaker, although I do love, love, love it :) So this weeks look is a Jawbreaker mix up with stamping.
So here is what I used for the actual manicure.
Base: CND Stickey
Color: 2 coats of Ulta3 Lily White
Accent Color nails: Pretty & Polished Jawbreaker
Top Coat: Seche Vite
Stamping: Kleancolor Metallic Yellow, Red, Blue
Stamping Plates: Fun Plate 2, Bundle Monster and Cheeky Plates
First of all, Pretty & Polished Jawbreaker!
Jawbreaker without Flash
Extreme close up of all the glittery goodness!
So here is what I used for the actual manicure.
Base: CND Stickey
Color: 2 coats of Ulta3 Lily White
Accent Color nails: Pretty & Polished Jawbreaker
Top Coat: Seche Vite
Stamping: Kleancolor Metallic Yellow, Red, Blue
Stamping Plates: Fun Plate 2, Bundle Monster and Cheeky Plates
Ulta 3 Lily White Base
Jawbreaker Accent- I did uncover the glitters in the polish with some acetone to make them more present.
Now on to the stamping using Kleancolor L-R Metallic Yellow, Metallic Red and Metallic Sapphire
Dodgy Bottle Shot
Stamping design, Left Hand
Please ignore cuticles, they had far too much acetone by the time I photographed.
Now on the stamping front, can I just say it was NOT easy with the bright colors on white and the fact that the Kleancolor Metallics are tricky to get a good transfer and bleed like all get out :/ It took quite a few goes to even get this. Maybe my stamping mojo wasn't on for tonight. Anyways, I like the matching color combo and how it eventually turned out.
Tips for stamping with the Kleancolor Metallics..scrape firmly, wait like 5-10 before picking up the design or it blobs. Then when the design is on the stamp wait another 5 seconds and transfer to the nail lightly. Don't press hard or it smudges.
Hope you liked todays offering, please leave your thoughts! :)
Subscribe to:
Posts (Atom)


