Friday 29 June 2012

Pretty and Polish Bayou Blitz

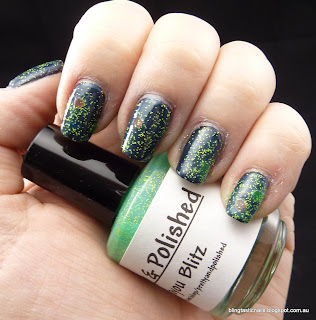
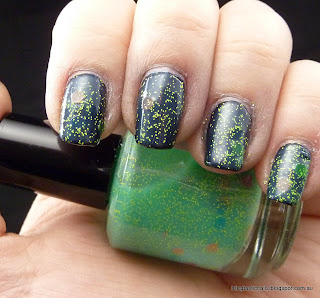
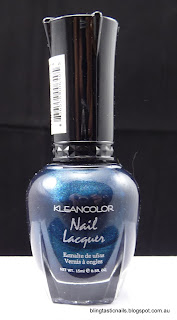
Hello, hello, hello and welcome to this evenings post. Not sure if this particular combination today is a massive nail fail or just a minor one. I really loved the darkness of Kleancolor Retro Green yesterday (flick back to have a looksee) and thought I'd put Pretty and Polished Bayou Blitz as an added top coat. Bayou Blitz is a vibrant green and yellow matte glitter polish with larger bright hexagons in it. So onto the polish!

Pretty and Polished Bayou Blitz
 Bayou Blitz

Pretty and Polished Bayou Blitz
 Back of the bottle

Pretty and Polished Bayou Blitz
Macro shot

So, I applied one coat of Bayou Blitz over Retro Green, this is no top coat.
You will have to excuse dry cuticles, winter sucks on my nails!

Pretty and Polished Bayou Blitz over Kleancolor Retro Green
 Bayou Blitz, no flash

Pretty and Polished Bayou Blitz over Kleancolor Retro Green
 Bayou Blitz, no flash

Pretty and Polished Bayou Blitz over Kleancolor Retro Green
Bayou Blitz, with flash 

Pretty and Polished Bayou Blitz over Kleancolor Retro Green
Close up with Flash
You can see in the last close up shot that the green base of Bayou Blitz changes the base color of Retro Green from a nice dark color to a more faded one. A base closer to the green color of Bayou Blitz might have generated a more pleasing result, although I do like the idea of a fluoro glitter over a darker base. The slight green tint appears to be more apparent with the flash though.

So, what do you think..nail fail or semi nail fail or does this color combo work for you?

Thursday 28 June 2012

Kleancolor Retro Green

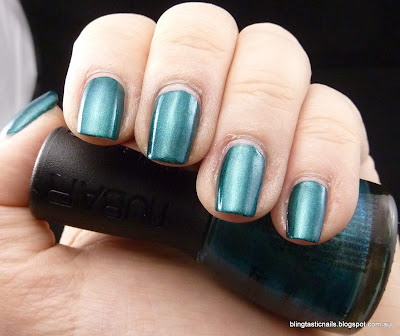
Swatch time tonight :) This evening we have Kleancolor Retro Green (106), which sounds awesome in theory and in reality? It's pretty awesome, just not super green. I would rank this particular color on the lower dark blue scale with teal shimmer. The formula is pretty nice, the application no problem. The usual difficulty with cuticle clean up applies.This is retro green with a base coat, one coat of Kleancolor and no top coat.
Kleancolor Retro Green
 Kleancolor no flash (and some cat hair, erk!)

Kleancolor Retro Green
 Kleancolor no flash

Kleancolor Retro Green

Kleancolor Retro Green
 Kleancolor Retro Green no flash

Kleancolor Retro Green
 Look how light reflective this is, even with no top coat!

Now with some photos with the flash to bring out the greeny/blue shimmer in the polish
Kleancolor Retro Green
 It kinda looks like black licorice here with some blue shimmer

Kleancolor Retro Green
 Retro Green with flash, blue shimmer 

Kleancolor Retro Green
One more (yes, pic overload!)

Clearly, you can tell I quite like this color from the pic spam. I really like the unusual polishes that are not the pretty, pretty shades. Kleancolor Retro Green definitely falls into that category. I think this color would make a great base for a glitter top coat. Might have to try that tomorrow :) This color would also stamp well I imagine!

My weekend doesn't begin until Sunday but it will last 4 days :)  I can see some nail art stamping swatches and creating happening but I still have to get through 2 more work days. Hope everyone else has fun weekend plans, did you like or not like Retro Green?

Wednesday 27 June 2012

Ulta3 Allure with Glitter and Bundle Monster stamping

Jas's Blingtastic Nail Blog Pic
Hello new Bundle Monster stamping plates!

Woot, new nail plates! Stamping plate geeks will all have ordered their Bundle Monster plates on June 20th when they were released and today (7 days later) I have received mine :) The new plates were eagerly anticipated by many including myself. I ordered mine from the Bundle Monster website as they were available there first, but I do  believe Amazon also sells the plates.
So what do they look like? They come in a cute package and looks like this:

Bundle Monster 2012 stamping plates
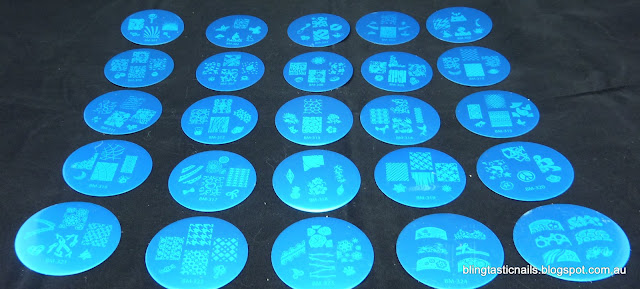
As the package says, it has 25 plates with backing paper as per the last set of Bundle Monster Plates, when I open the packet I did so with caution after being warned that they edges were hella sharp. YES, they are sharp and even through careful handling I took some skin off. Blerg! Nothing that drew blood but do be careful. The plates come with a blue plastic coating, as shown below. Hint No1. Take the Blue Plastic off! Obvious to the old hat stamper but not always the new comers to they joys of stamping.

Bundle Monster 2012 stamping plates
With Blue Plastic

Bundle Monster 2012 stamping plates
 Without Blue Plastic

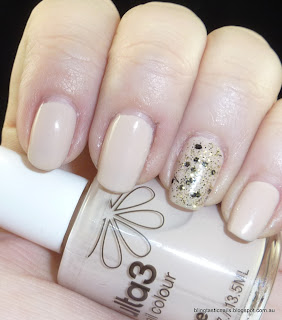
Of course, I had to give these plates a quick go, so I decided on a beige mani base with a glitter accent finger on either hand and then various black Bundle Monster stamping designs.

I used Ulta3 Base Coat, Ulta3 Allure and on my ring finger one coat of Nubar Black Polka Dots and one coat of Ulta3 Gold Digger.

Nubar Black Polka Dots, Ulta3 Allure and Ulta3 Gold Digger
L-R, Nubar Black Polka Dots, Ulta3 Allure and Gold Digger

Nubar Black Polka Dots, Ulta3 Allure and Ulta3 Gold Digger

Nubar Black Polka Dots, Ulta3 Allure and Ulta3 Gold Digger
 I really liked this mani on it's own without the stamping!

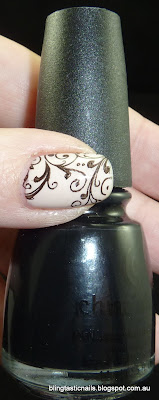
For the stamping I used China Glaze Liquid Leather. Here is how it turned out (Click the pictures for a close look at the designs)
Bundle Monster 2012 stamping art
Left Hand without Flash

Bundle Monster 2012 stamping art
 Left Thumb with Flash

Bundle Monster 2012 stamping art
Right Hand stamping without Flash


Bundle Monster 2012 stamping art
 Right Hand Stamping with Flash
I think my right hand was the favourite with the birds design on the thumb, the barb wire design on the middle finger and the newspaper print design on my index. So did I love these plates? At first glance, yes! There are a great variety of stamps, from Easter to Halloween, swirls, puzzle pieces, Owls (how awesome is that!), devils and as always some flower designs.
Are the plates easy to use? Apparently the second generation BM plates were on the difficult side. I didn't have any troubles with them. The 3rd gen plates seemed to scrape easily and transfer quite well onto the stamp. To stamp the designs onto my nails as above took me around 2 hours. Is that long you ask, grrr yes! It took me forever for me to be happy with the design transfer on my nails I had to redo the polish on 2 of my nails 3 times! I just couldn't get things to line up or the design didn't look quite right on my shortish nails. The barb wire design on my middle finger I had to put each line on individually or it looked strange. The other middle finger was difficult to get just the right amount of design in the right place to look good.

I am calling all my difficulties operator error at the moment and reserving judgement until next time I use these plates due to working a 10 hour shift and not eating dinner before attempting the stamping (I was too excited!)

Hope you like my first attempt at a few of the new Bundle Monster designs, will you be getting them? Or if you have the new plates, how do you find they stamp?

Monday 25 June 2012

Kleancolor Sandstone, Ulta3 Early Grey and Ulta3 Gold Rush Fever Gradient

Tonight, I am going to show you a lovely neutral gradient mani that I did after my Flying Dragon Floam mani peeled off after I may have used Ulta3 Non Chip top coat instead of the base, oopsie! I will show the result in just a moment, it's not exactly super pretty, but it's art I tell you..art! LOL. The colors I used are here:
Kleancolor Sandstone, Ulta3 Gold Rush Fever, Ulta3 Earl Grey

But first, I don't usually do rants because you always upset someone, but I've just read something on another blog of whose name I won't mention because she doesn't deserve it. Seriously. I am that so astonished and incensed at what I read that I am not going to mention her name, but I am sure you can guess who/what it's about with recent polish world goings on. ANY respect I had for this polisher as a person has gone, gondidy, gone, gone. I am not even going to go into what it says but it left me thinking "Oh my giddy aunt and are you freakin' serious?" I haven't read anything so delusional, nor more clarifying of how I feel about the whole thing. I was a bit Switzerland on the whole thing until today. Now I understand why a few people reacted like they did and their actions. My actions will be to not enable any further delusions of grandeur ...do you think the average chick wants polish at super inflated prices supported by the creator? Not this one. Simple as that.

Anyways, moving forward, I hear Dollish, Pretty & Polished AND Crows Toes have joined Llarowe..so exciting! I have managed to order some Dollish polishes and am waiting for them. I also have some Pretty & Polished polishes which I love and was sad when she announced that she wasn't going to ship internationally. Also was lusting after some of the Crows Toes polishes but again no international shipping, now not a problem! I shall make some mine :) Lets go forthwith onto the gradient mani!

The colors I used, Kleancolor Sandstone (42), Ulta3 Gold Rush Fever and Earl Grey. I was hoping to achieve a neutral but still interesting mani! I applied Ulta3 base coat, 2 coats of Kleancolor Sandstone. Then took a makeup sponge and painted 3 lines of polish with Kleancolor Sandstone at the top, Gold Rush Fever in the middle and Earl Grey down the bottom. The polish lines made up the length of my nail and then I dabbed and moved the sponge up and down slightly. This is the result.

Beige, gold and taupe mani
I like the foil shiny effect, even though Earl Grey is a creme

Beige, gold and taupe mani


Beige, gold and taupe mani
 Beige, Gold, Taupe gradient with flash

Beige, gold and taupe mani
With a change in light/angle the gold can look gold or bronze, the bronze doesn't mesh quite as well.
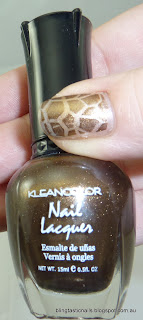
After a day I tired of the neutralness and thought, stamping..have at it. I'd swatched Kleancolor Coffee Addict previously and thought it would go well, so did a few accent stamping nails to make this mani bling a bit :)


Beige Gradient Mani with nail art stamping
 Left hand stamping using Konad and Bundlemonster

Beige Gradient Mani with nail art stampingBeige Gradient Mani with nail art stamping
 Left Thumb stamping with Cheeky Plates

Beige Gradient Mani with nail art stamping
 Right hand stamping with Cheeky plates and Bundle Monster

Beige Gradient Mani with nail art stamping

Beige Gradient Mani with nail art stampingBeige Gradient Mani with nail art stamping
 Right Thumb without and with flash

 The stamping transforms this gradient mani from pleasant to great. I particularly like the thumbs as one looks very giraffe pattern like and the other thumb looks snake skin like! A very happy co-incidence. This also answers my posed question does Kleancolor Coffee Addict stamp well? Yes, yes it does. I did a top coat with Seche Vite and there was no bleeding of the stamped design as with some Kleancolor colors.
Phew, that turned out to be a bit of a marathon post..I hope you didn't mind and congrats if you made it all the way to the end! Hope your week is going well, I get to sleep in tomorrow before my shift and am mightly looking forward to it :)

Sunday 24 June 2012

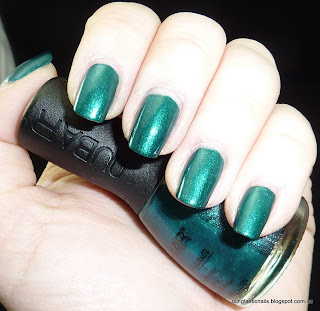
Nubar Earth

A color called "Earth" brings to mind a browney, chocolatey color in my visual mind of nail polish colors, you think? Nubar though has different ideas. Earth according to them is a dark green blue color that changes with the light. Maybe it's the color of how the earth looks from space? Anyways, just wanted to show you this lovely color from Nubar.

Nubar EarthNubar EarthNubar Earth
Nubar with no flash, different light angle and with flash

Nubar Earth
 Nubar Earth front on

Nubar Earth
Nubar Earth with Flash, could it be any greener?

Nubar Earth
 Little blue flecks coming through in the light

Nubar Earth
 Noice silvery blue sheen :)

Nubar Earth
 Blue tones takes finally overtake the green ones here!

As you can see, this polish is quite dark greeney/bluey which is quite vampy for a green! But I think there is enough light blue tones to take this polish beyond boring ole green. This was 1 coat of Nubar over a base coat, no top coat. I think a top coat would enhance the color alot and make it oh-so-shiny. In my head I want to stamp it..and glitter it. But then I can't help myself, the more polish the better! The polish was really easy to work and dried in standard time.
Not sure Nubar Earth is everyone's cup of tea...what do you think?

Saturday 23 June 2012

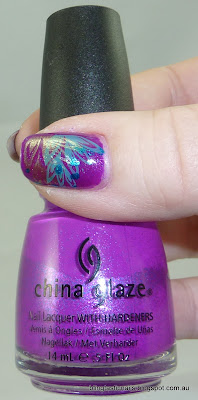
Nail Venturous Floam and China Glaze Flying Dragon

Flying on a Floam Dragon..Sounds exciting, doesn't it? Well it is! I was going to have Floam Friday and I infact did this mani on Friday BUT there may have been a slight hitch with the lightbox that I use when my naughty black cat attacked it a little. There was some clean up to be done before use again. Grr. He's too cute to stay mad at for long and there wasn't any unfixable damage, so onward and upward.

So, what does Floam and Flying Dragon combo look like, it looks awesome!
China Glaze Flying Dragon with Floam over it

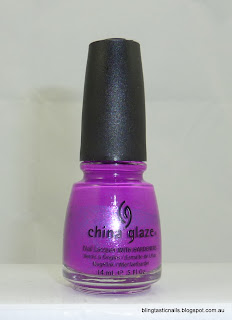
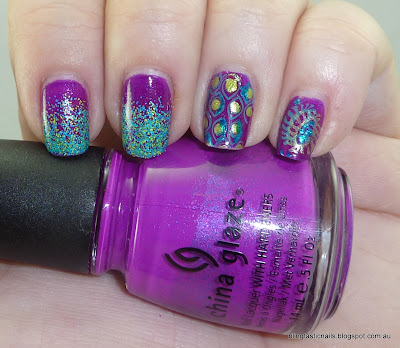
I did my whole mani yesterday without taking photos except for the final look, but you'll get the general idea. I was inspired to use my Floam and thought China Glaze Flying Dragon (neon) would go well. It didn't turn out as neon as I wanted it, but it was still pretty darned good.

Nail Venturous Floam
Nail Venturous Floam, without and with Flash

China Glaze Flying Dragon (neon)China Glaze Flying Dragon (neon)
 China Glaze Flying Dragon (neon) with and without flash (so hard to photograph!)

Kleancolor Jazz Olive, Catch Me and Metallic Aqua
 Kleancolor Jazz Olive, Catch Me and Metallic Aqua

 I applied Ulta3 Base Coat, 2 Coats of China Glaze Flying Dragon Neon (borrowed pic)

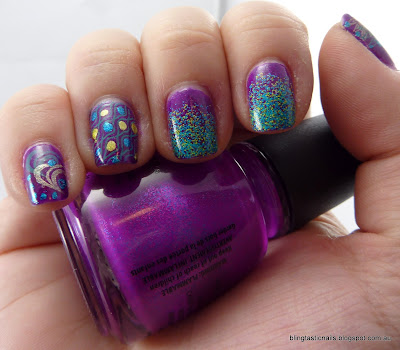
Then I did a coat of Floam on my index and middle fingers and stamped with Catch Me and Jazz Olive and using a dotting tool I dotted some accents with Metallic Sapphire. I used Bundle Monster plates for the stamping.
China Glaze Flying Dragon with Floam and stamping
Flying Dragon with flash and Floam!

China Glaze Flying Dragon with Floam and stamping
I think the color combination looks very fun :)

China Glaze Flying Dragon with Floam and stamping
Left Thumb, I attempted to layer the stamp with interesting but not super clear effect. The detail is hard to pick up in a photo :(

China Glaze Flying Dragon with Floam and stamping
Right Hand stamping

China Glaze Flying Dragon with Floam and stamping
 Without Flash

China Glaze Flying Dragon with Floam and stamping
 With Flash

China Glaze Flying Dragon with Floam and stamping
 Right Hand Thumb Design (with flash)

Flying Dragon is so hard to photograph! I didn't think it would be. The photos with the flash seem to show the stamping designs a lot clearer. I actually really love this look in person, the contrast between the Flying dragon and Floam is awesome! The color I chose to stamped were in an attempt to compliment the Floam, I hope you think I did alright on that. Any thoughts?

Oh, and here is a quick pic of my furbabys who I love as much as my polish!
Tiller and Gixxer
Meet my boys :) Gixxer is on the left and Tiller (special kitty) is on the right.
These 2 are brothers who are so fun and great company for me and each other.